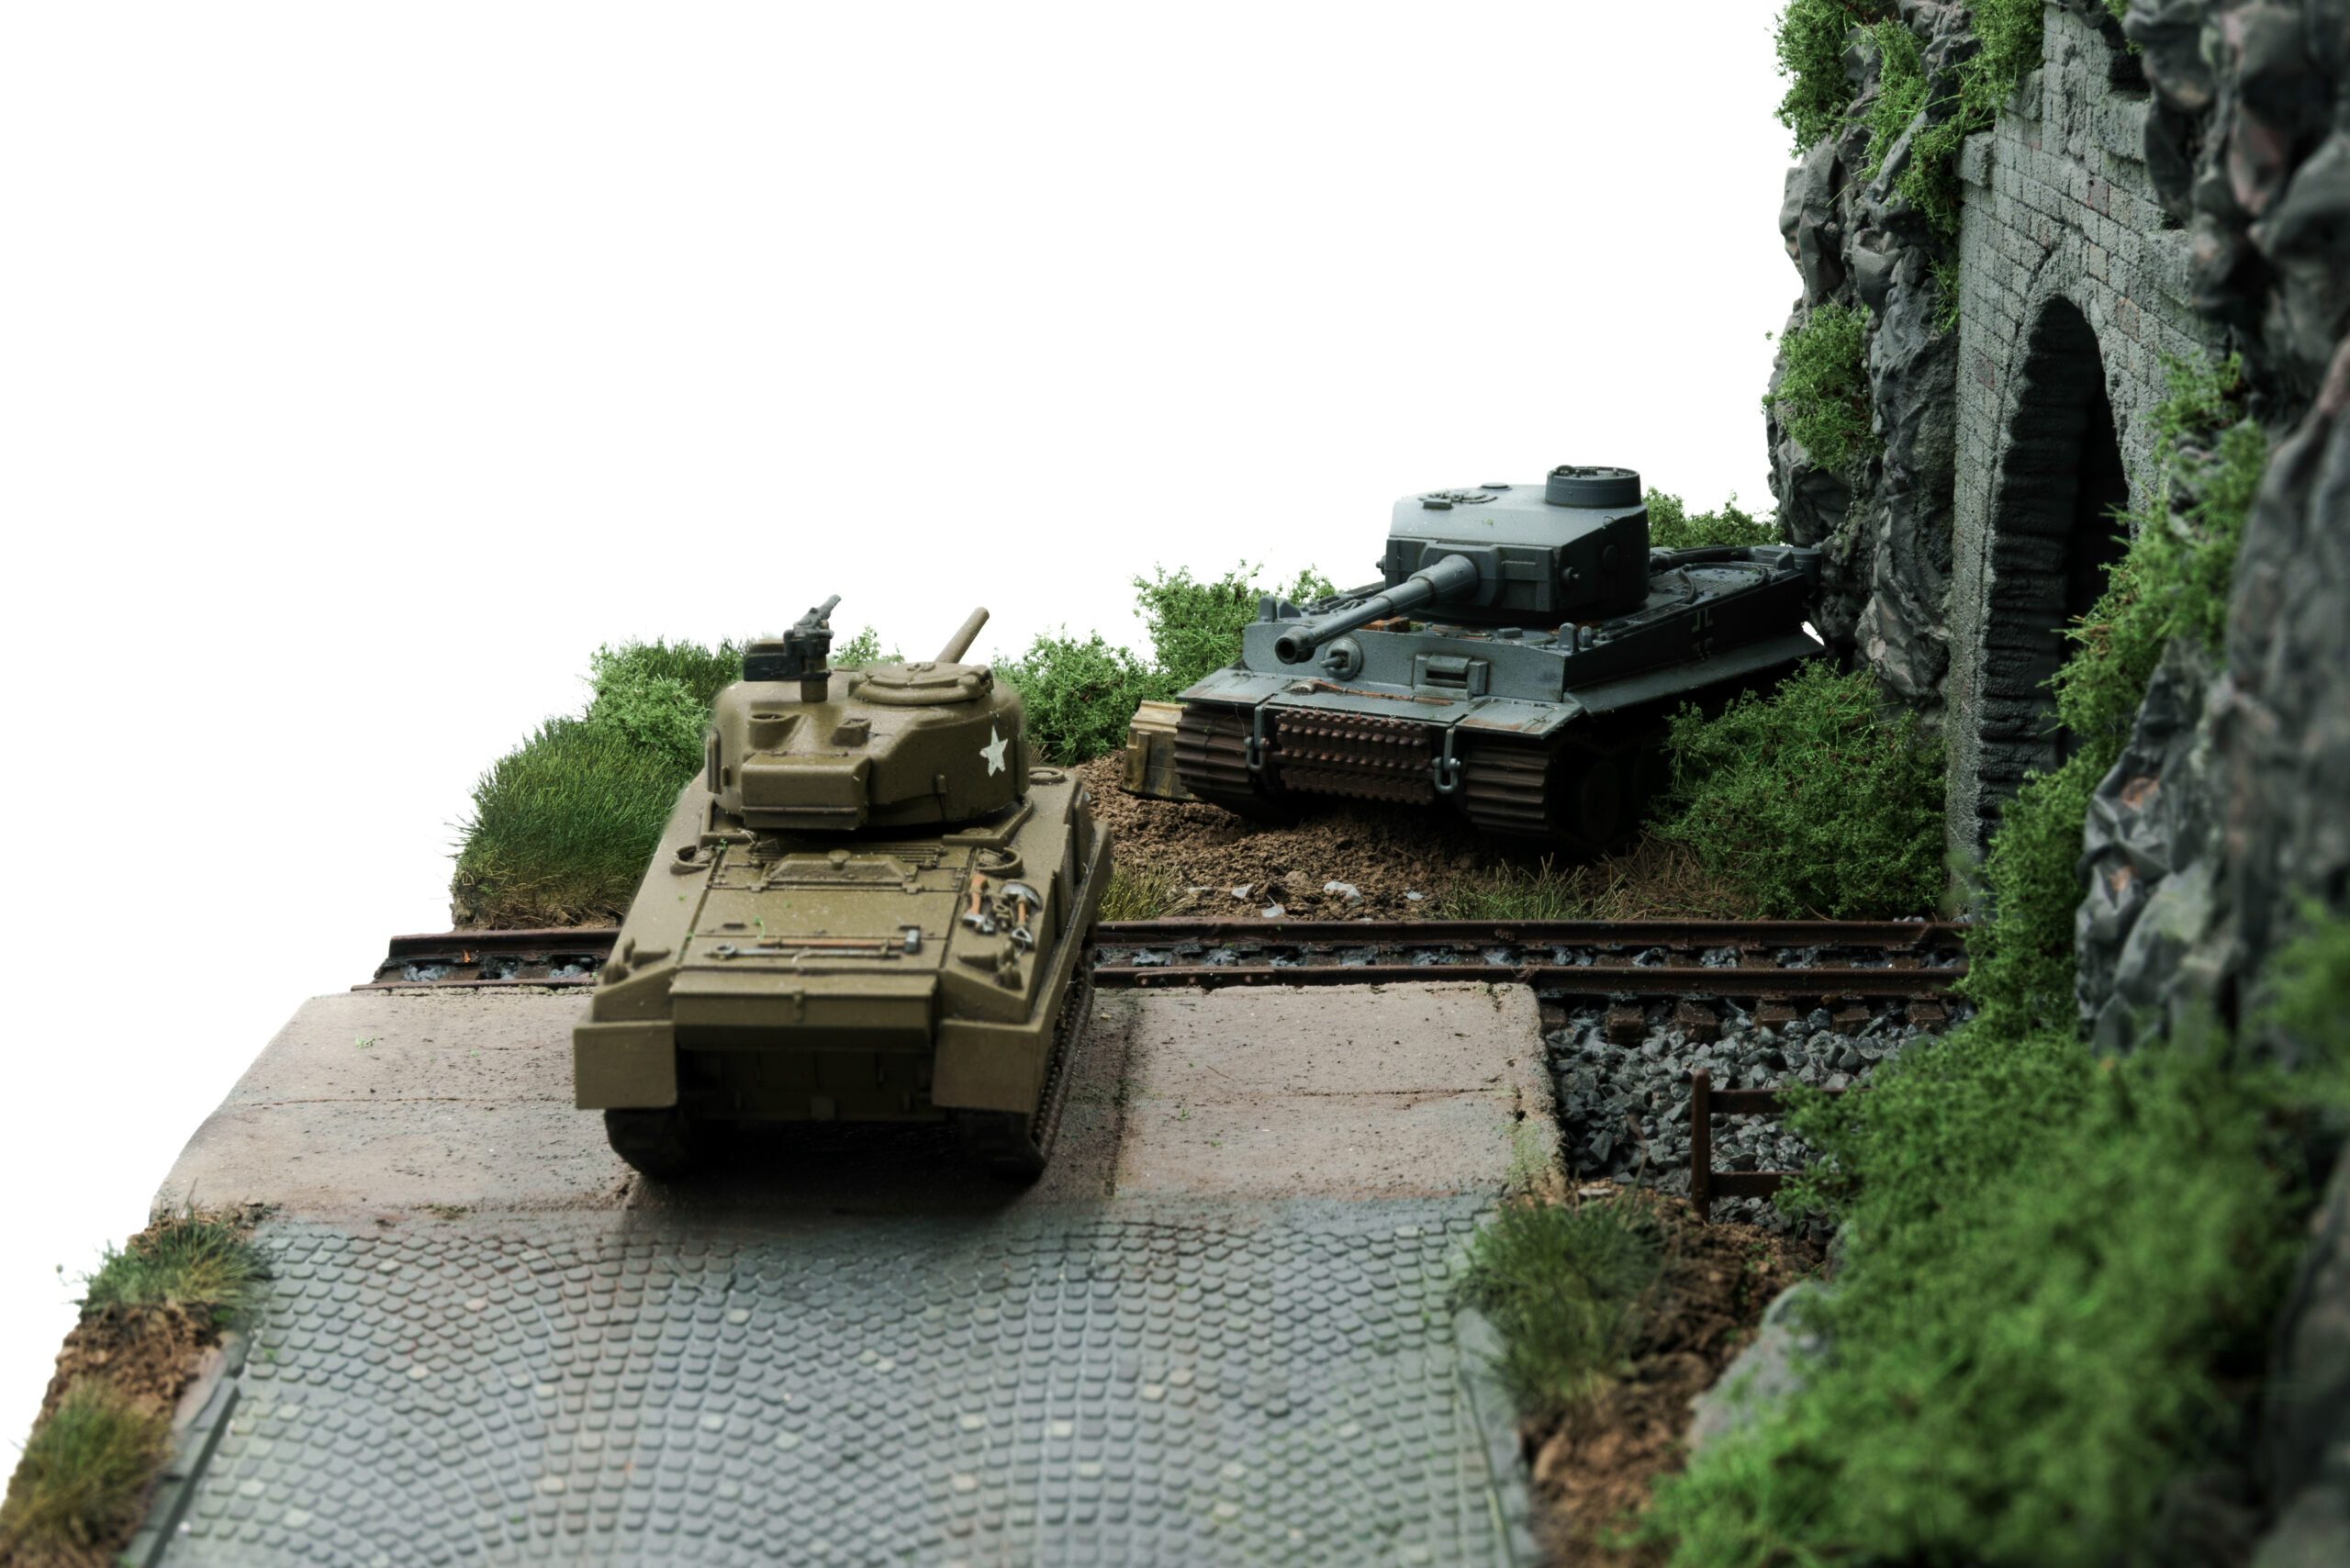
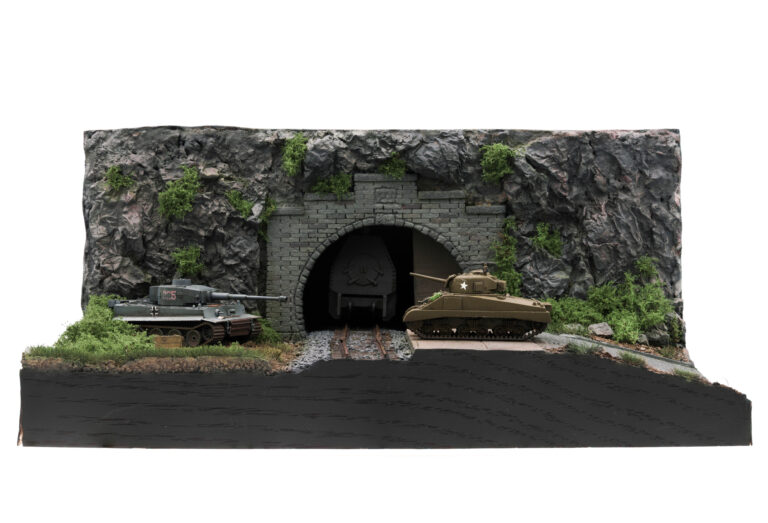
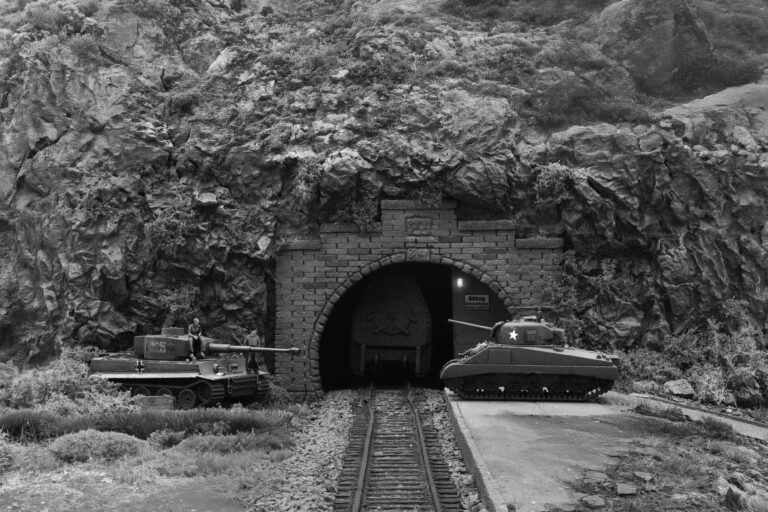
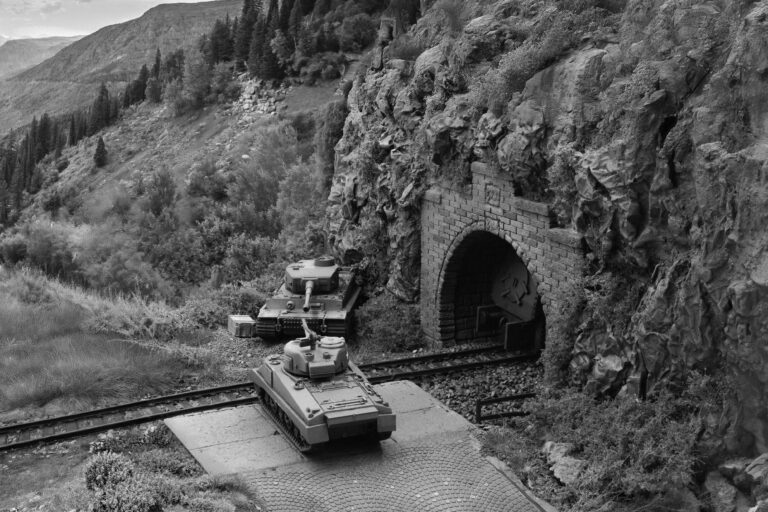
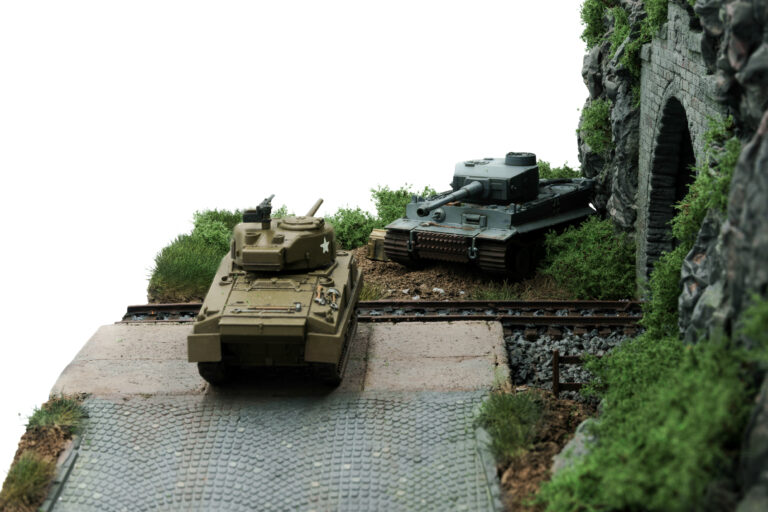
A Sherman still on its sprue, a Zvezda Tiger, a tunnel made of plaster and rigid foam, soil made from coffee grounds: over almost two years, those became a diorama in 1:100 scale. You know how it goes. An old model was lying around, and at some point I thought I could put it to use. Whenever I had the time and felt like it, I worked on the scene at my hobby desk in the bedroom. It isn’t glamorous, but everything I need is there.
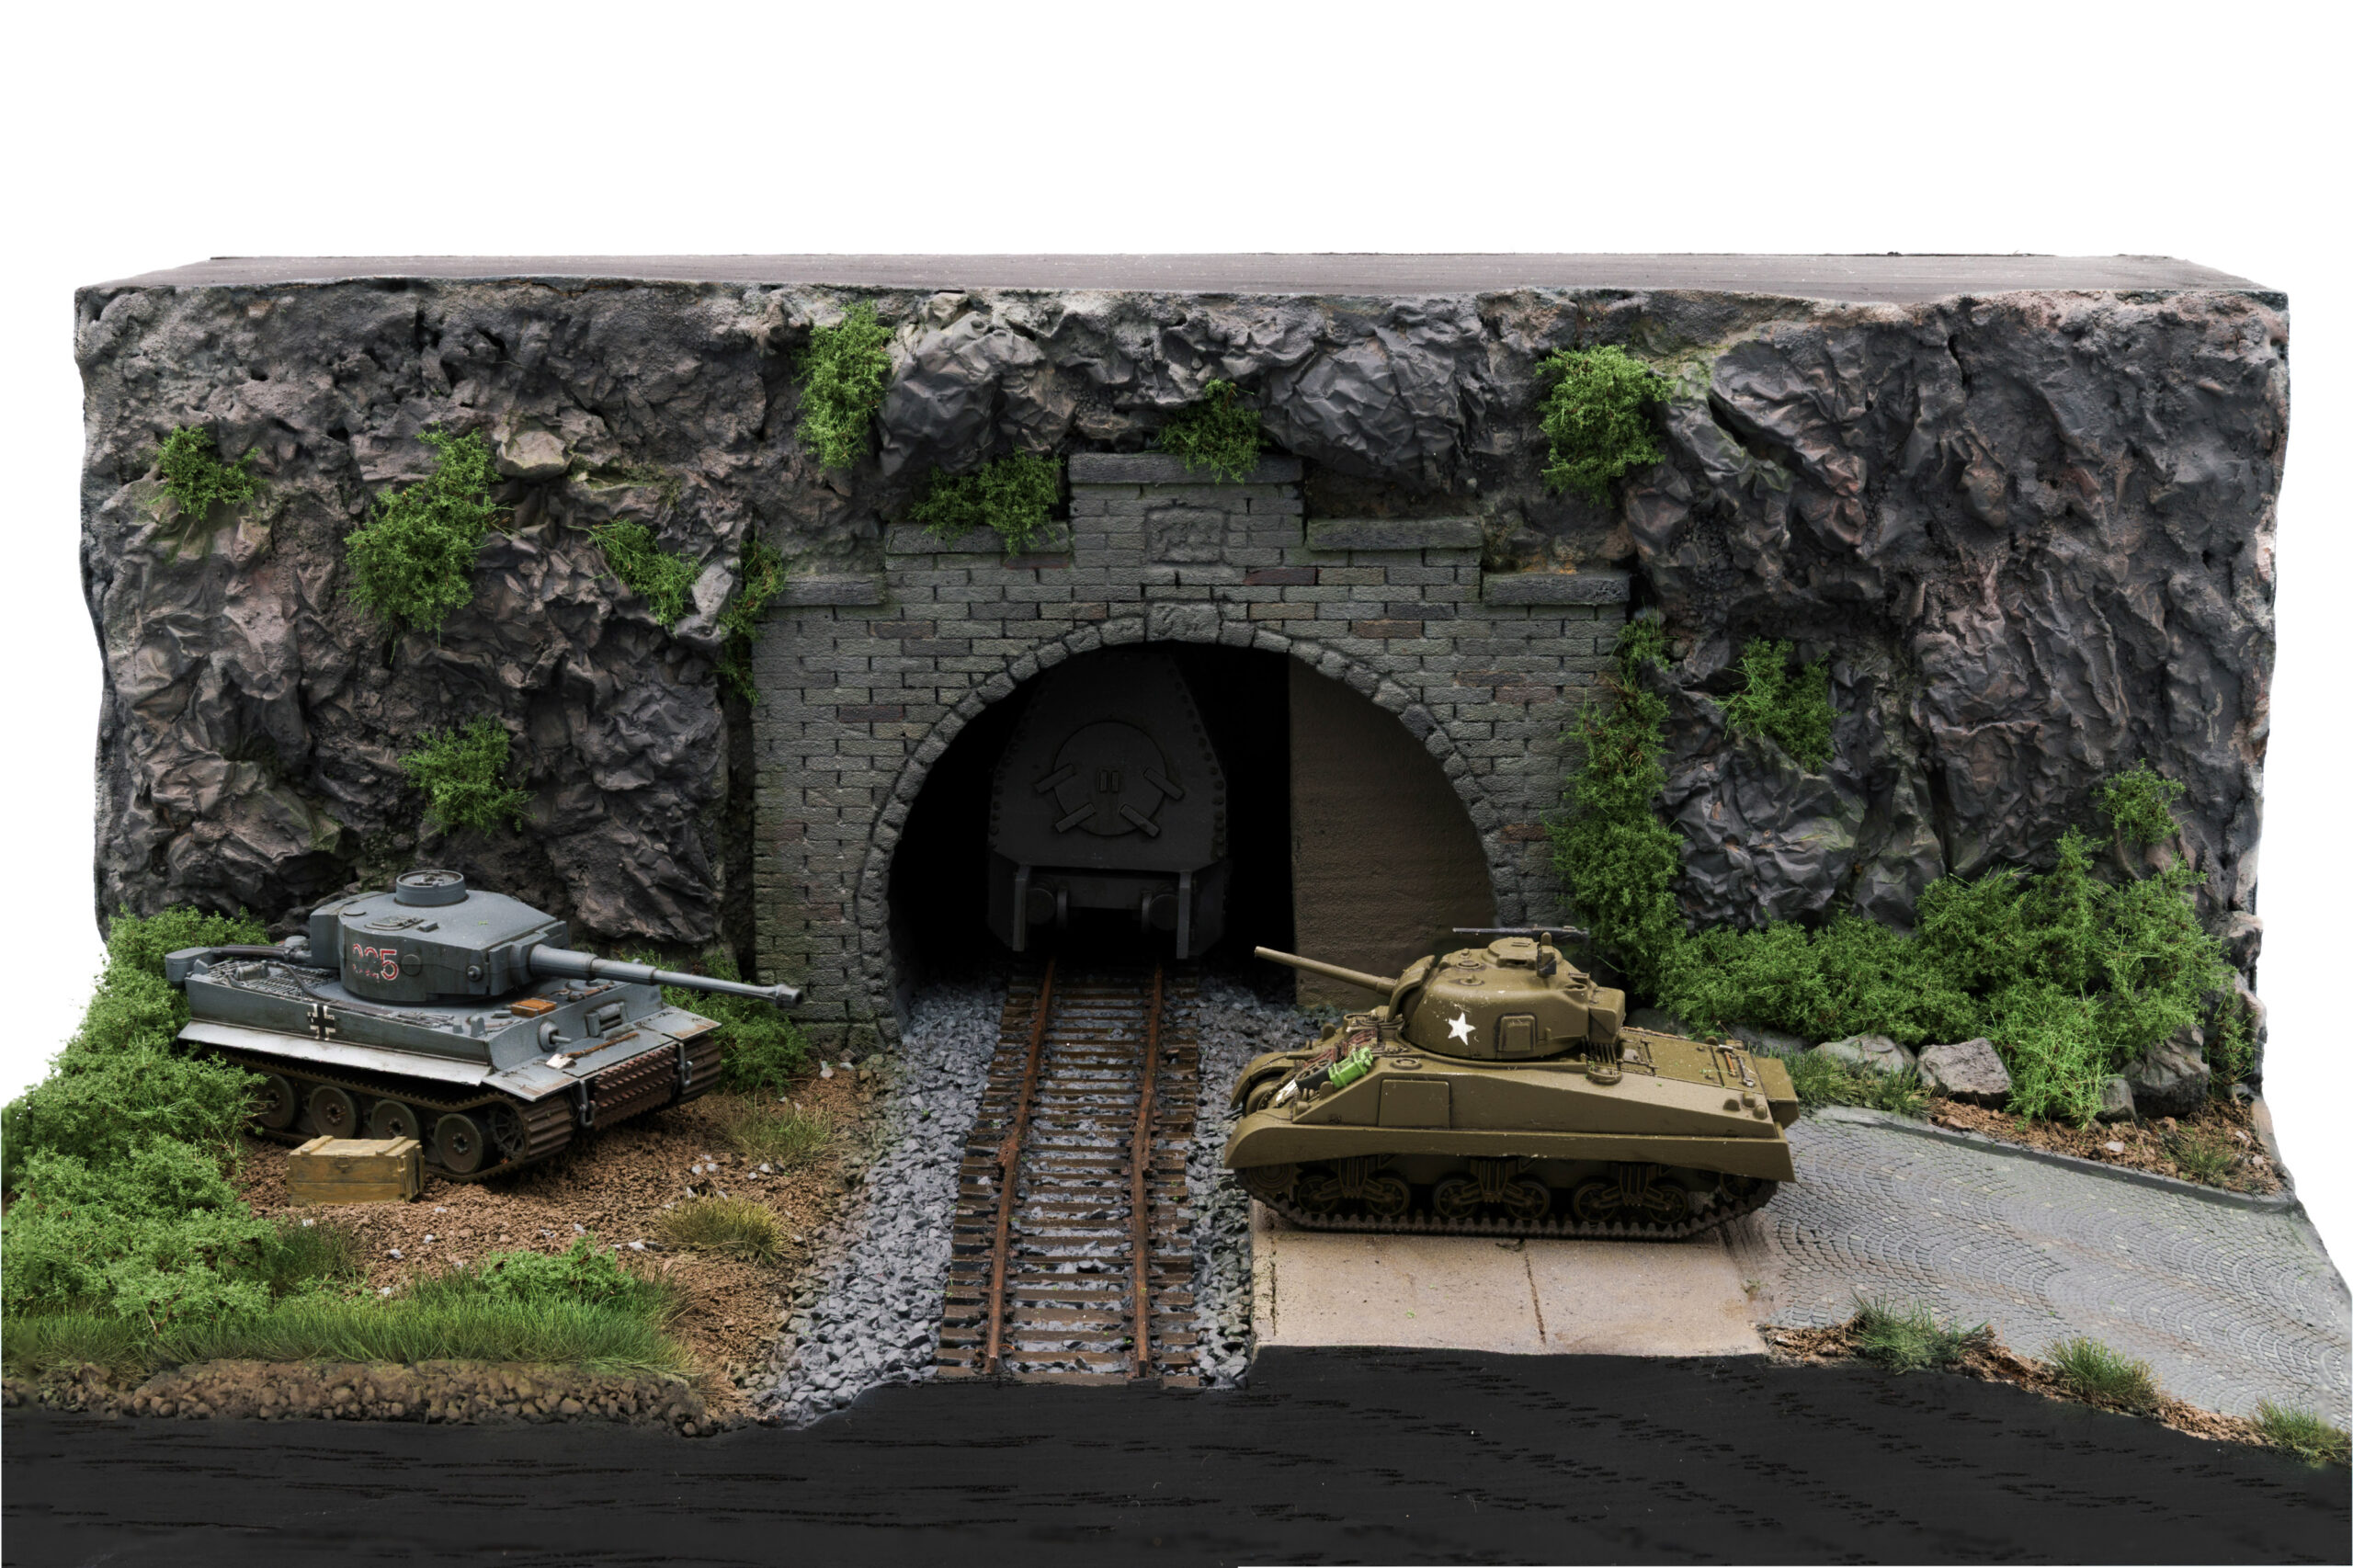
If you want to build a diorama yourself, this is how I got there: tunnel, rocks and soil made from stuff almost every household has lying around, locomotive and tracks from the resin printer. There is also a story. I only wrote it once the scene was nearly finished. It is called “The Last Order” and it is online now. So the diorama was not an illustration for the story. It was the other way around. At the end, I put the model, the story and what actually happened in the Harz Mountains in the spring of 1945 side by side.
Why a 1:100 Diorama?
I had no plan. There was no mood board or sketch. I don’t plan my hobbies much anyway, including model building. Where would the fun be?
There was still a 1:100 Sherman in a drawer, the parts still on the sprue. A coworker had given it to me ages ago. Manufacturer? No idea. Probably something from the Flames of War corner, a tabletop wargame in 15 millimeters. Too good to throw away, but too small to stand on a shelf by itself. Then a Zvezda Tiger I came along, also in 1:100. Now I had two tanks in the same scale and a picture in my head: tunnel, tracks, late war. That was it.
I built the diorama between May 2023 and February 2025. It wasn’t an enormous amount of work. I just worked on it in stages. Weeks sometimes passed without anything happening. Then I would spend a weekend moving the tunnel, the rocks and the tanks forward all at once. You know those projects. Afterwards you say, “I spent two years on that.” The hours I actually worked on it were probably somewhere in the double digits.
Why 1:100, then? Honestly, the scale wasn’t my choice. It came with the Sherman. In 1:35 you can go wild with details. In 1:100 you have to work more broadly, add a few accents and see how the scene looks from a little distance. That works surprisingly well for a compact scene. Two vehicles, a tunnel and some terrain don’t take up much room.
The drawback is obvious too: everything is fiddly. Parts are tiny, edges are fine, and there is hardly any room for color transitions. A longer session leaves you feeling it in your eyes and fingers. Anyone used to building in 1:35 will need to adjust.
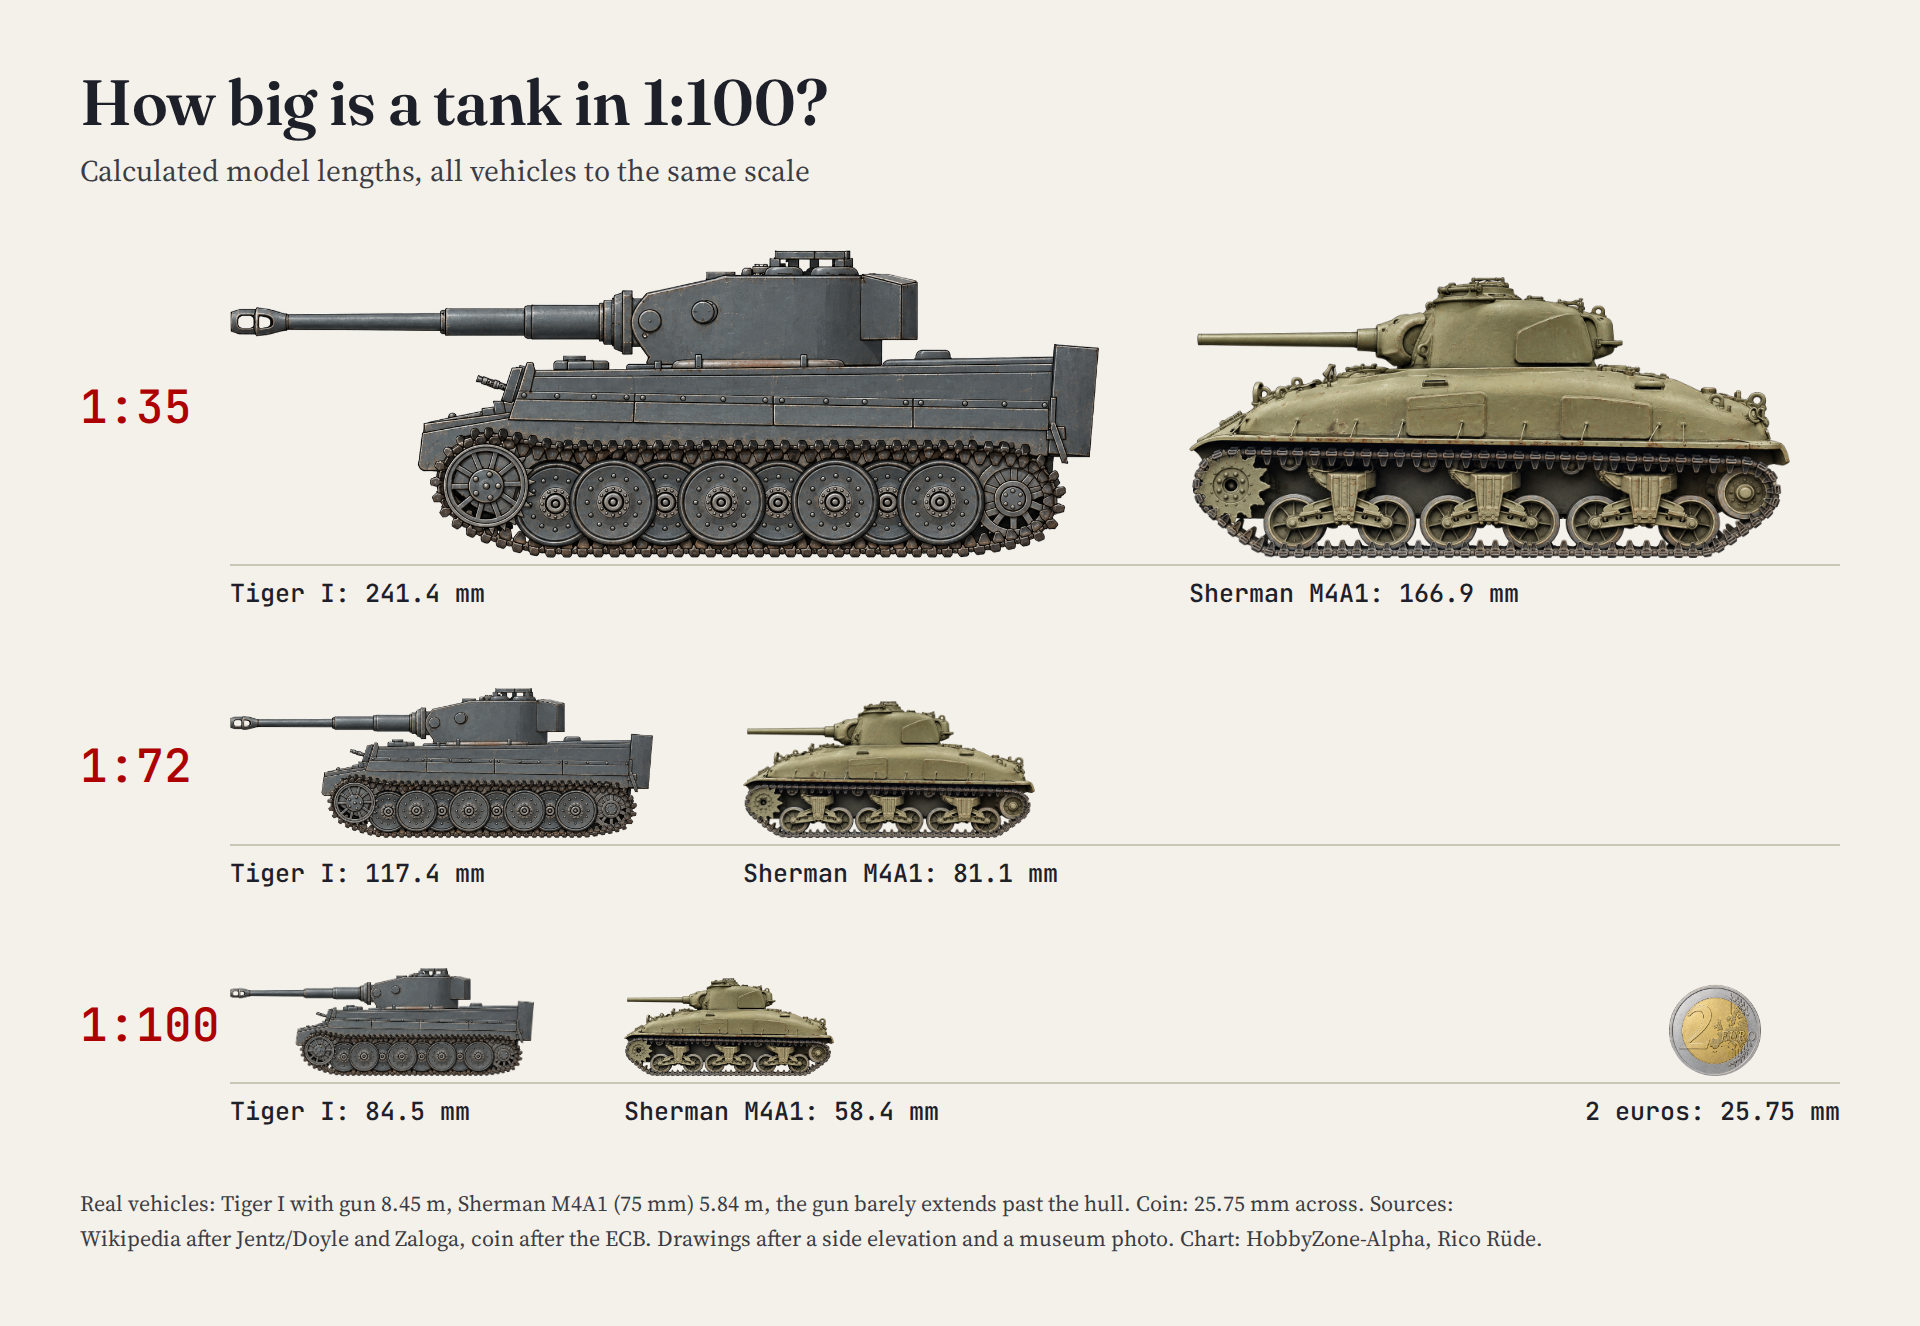
How Big Is a Tank in 1:100?
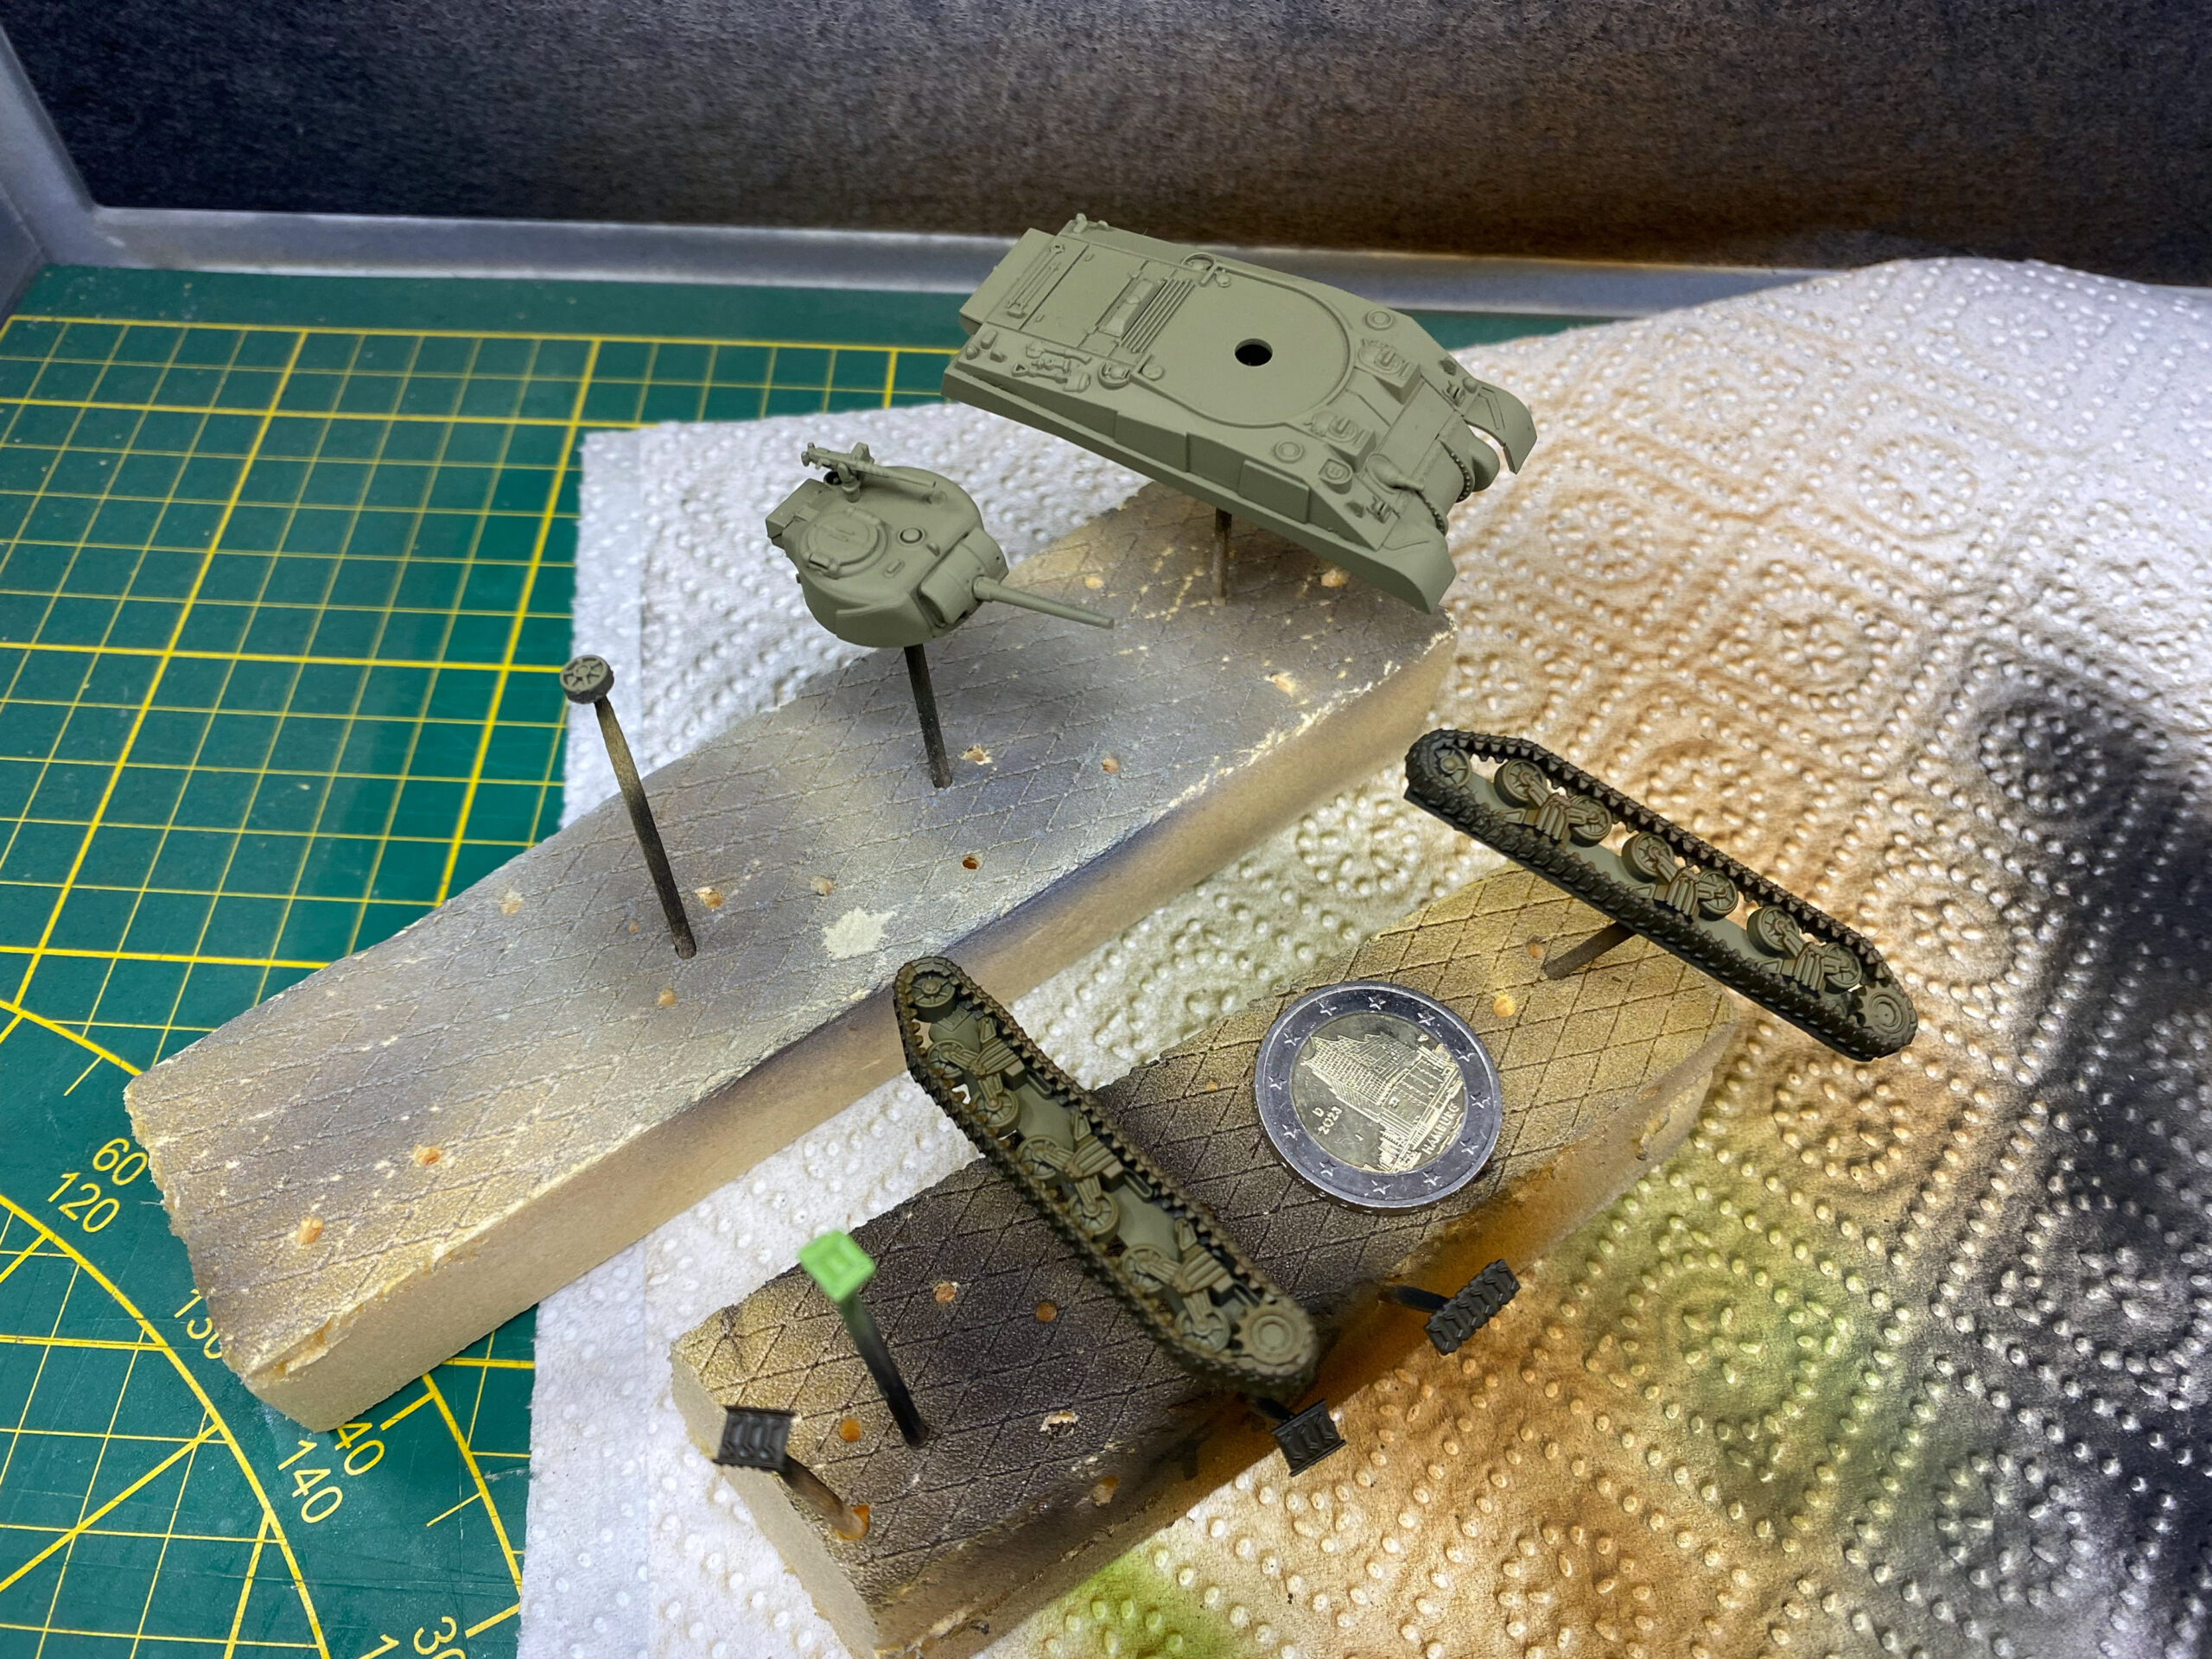
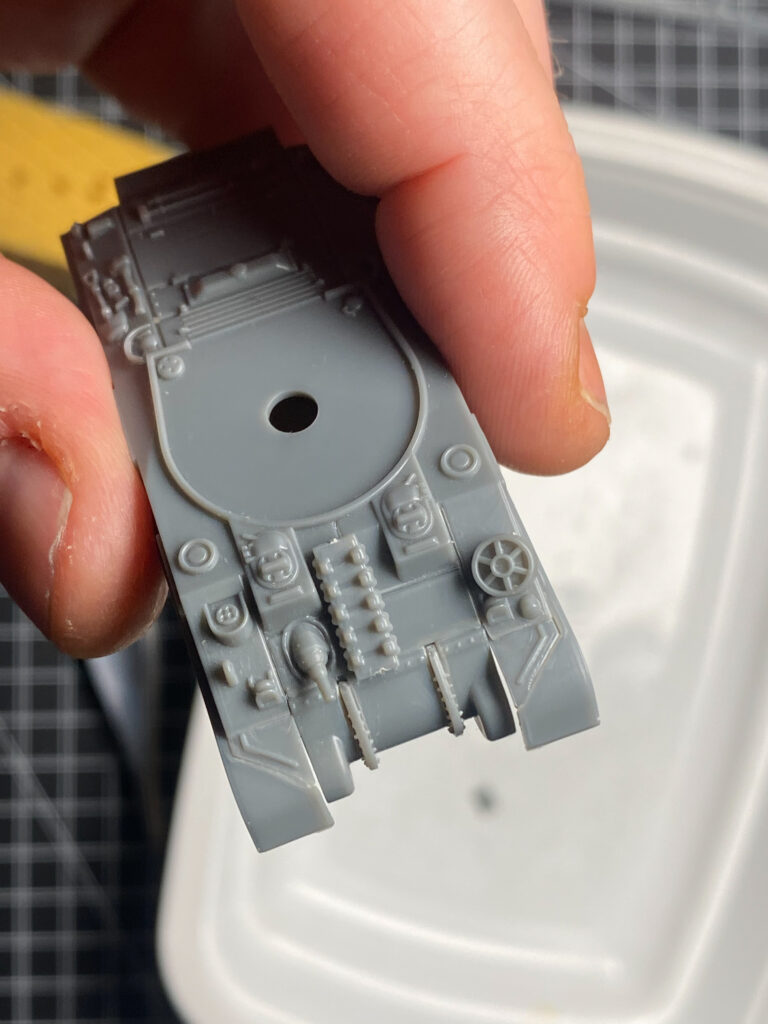
A Tiger I is 8.45 meters (27.7 ft) long including the gun, so 84.5 millimeters (3.3 in) in 1:100. For the Sherman I use the early versions with the short 75 mm gun as a reference, the M4A1 for example: 5.84 meters (19.2 ft) long, which makes a little over 58 millimeters (2.3 in) as a model. The Sherman is a bit longer than two 2-euro coins side by side, and a 2-euro coin is slightly bigger than a US quarter. The Tiger comes to a good three.
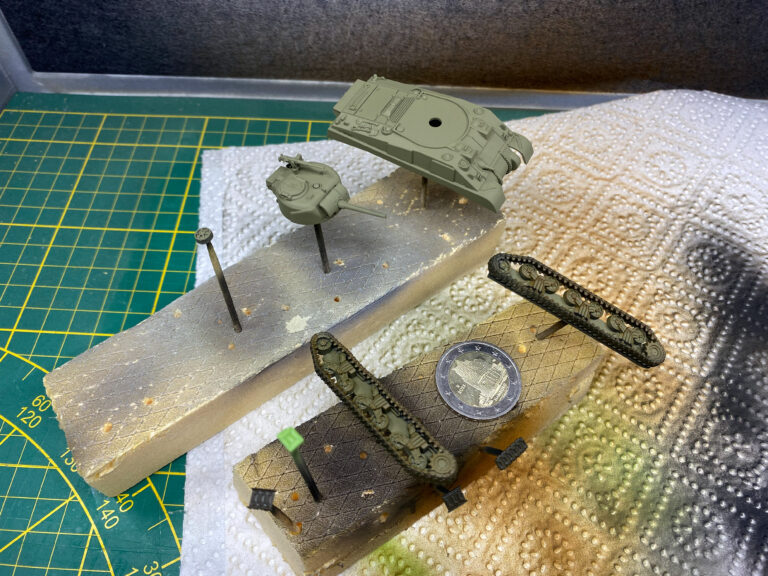
The Sherman’s running gear next to a real coin shows how small it is in your hand.
Building a Diorama Yourself: Tunnel and Terrain
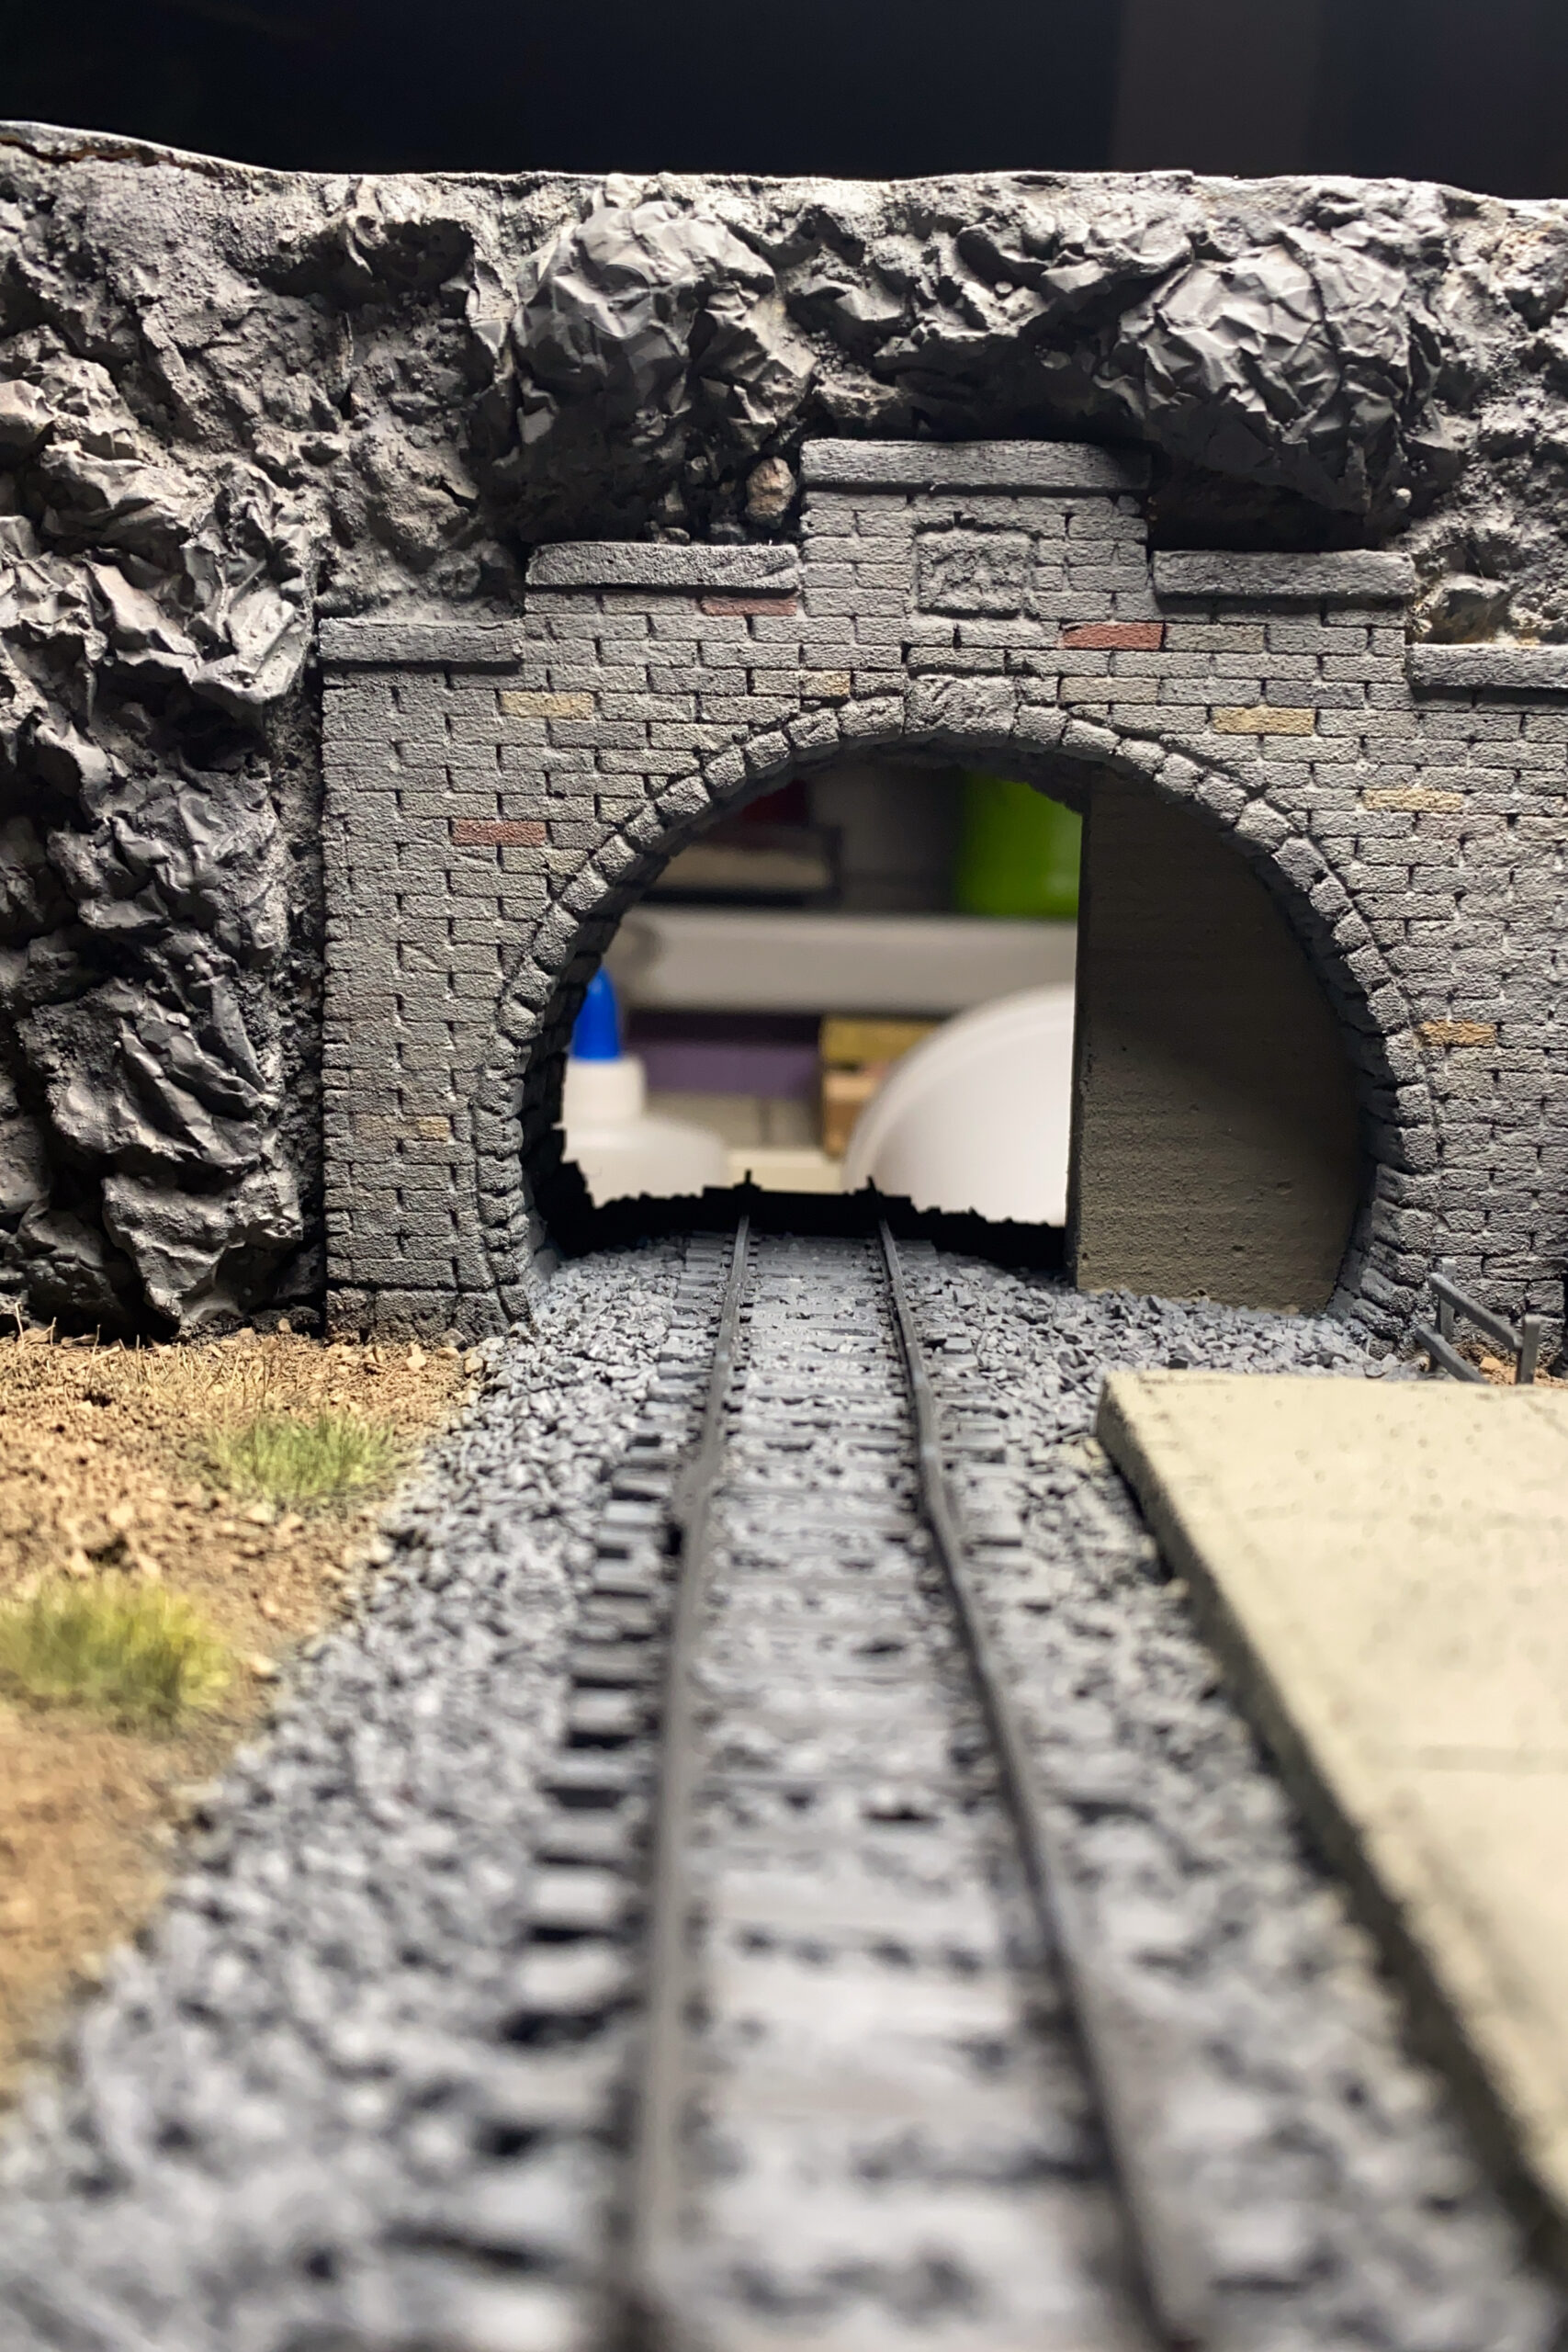
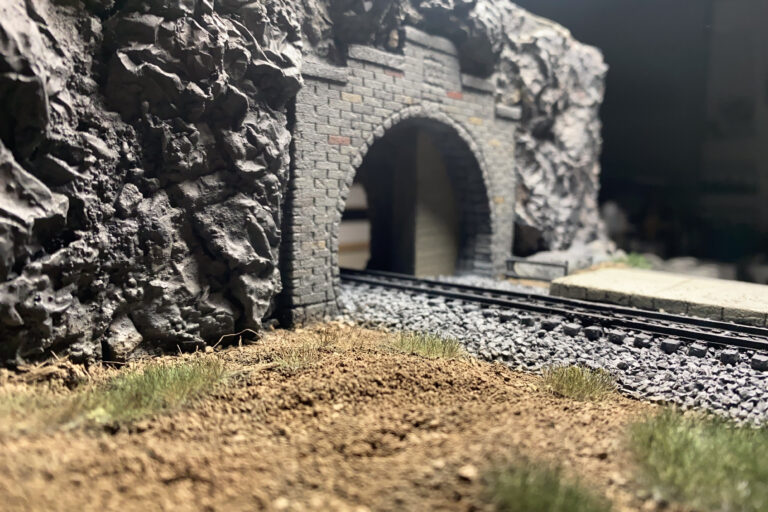
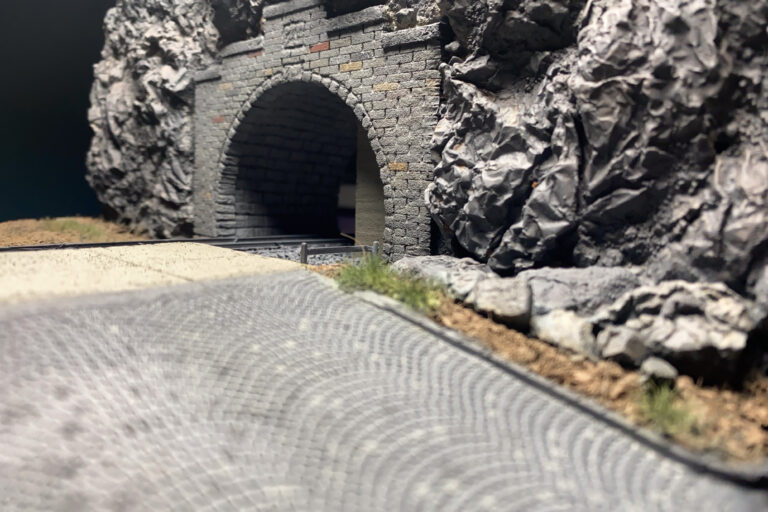
Without the tunnel, there would be no train and no scene. I found a template for a tunnel portal online, from the model railroad world. It gave me a rough direction. I built everything else myself, almost entirely with material I already had.
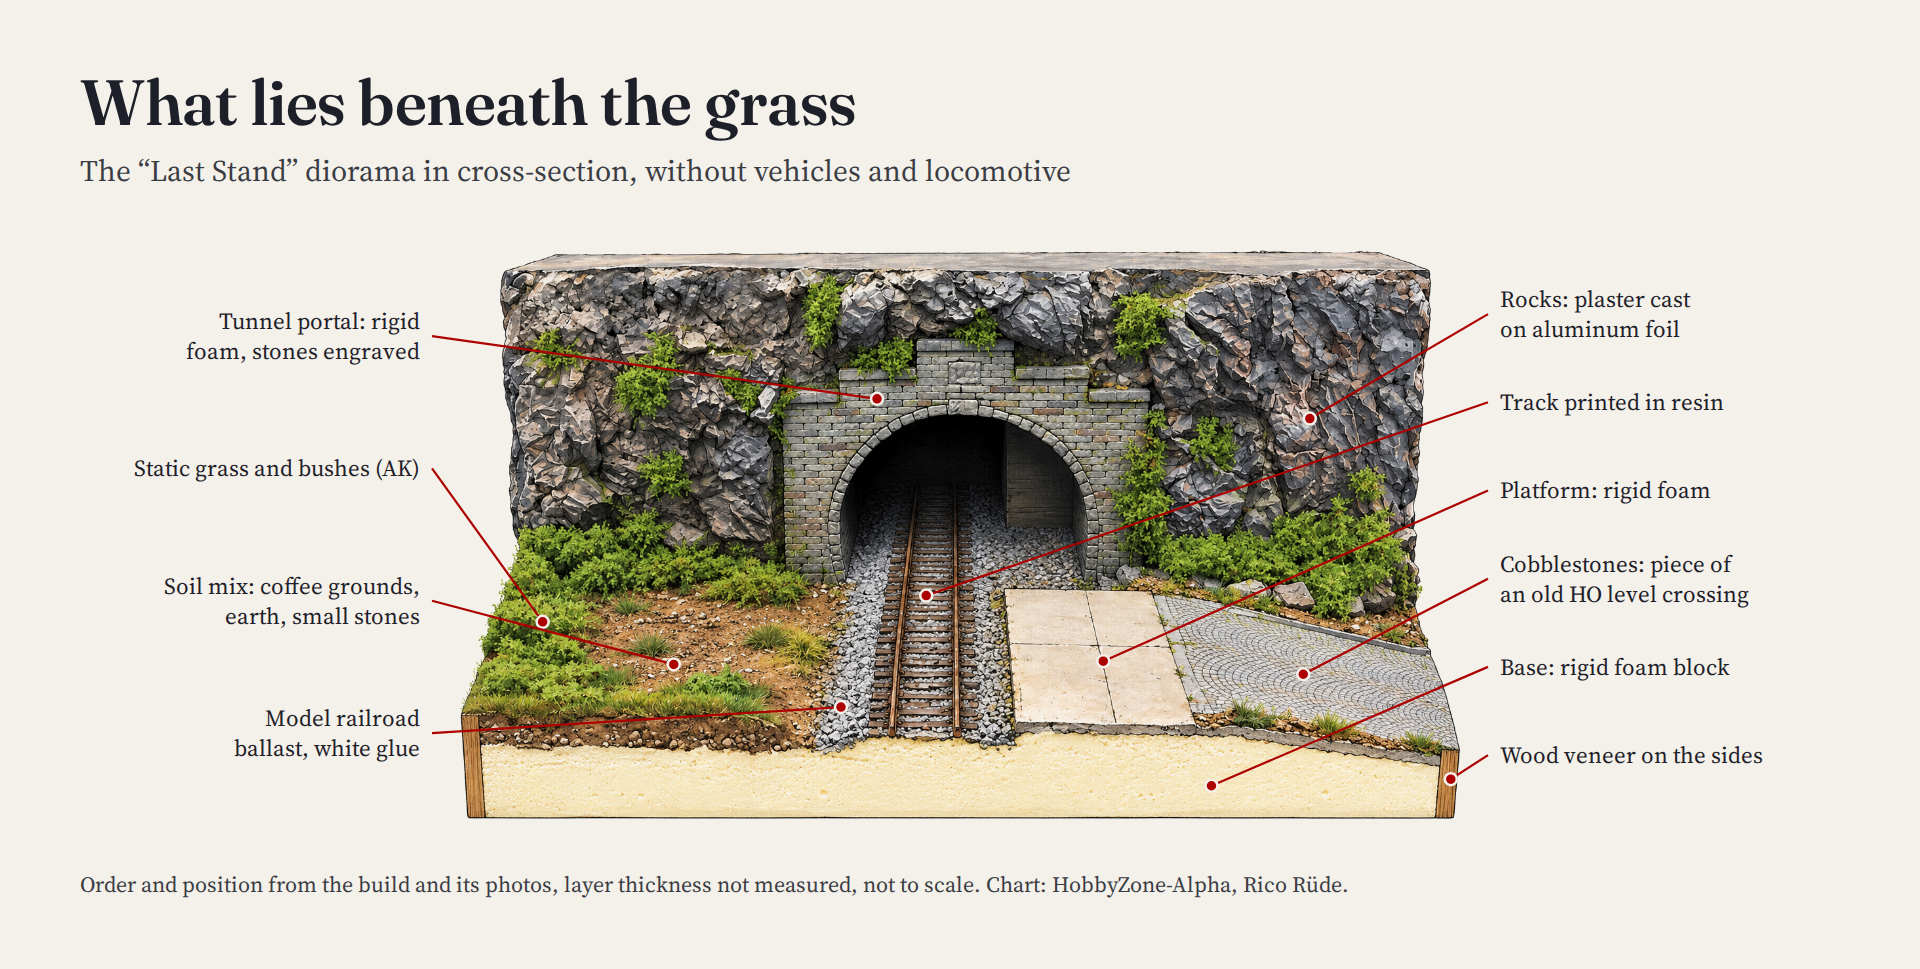
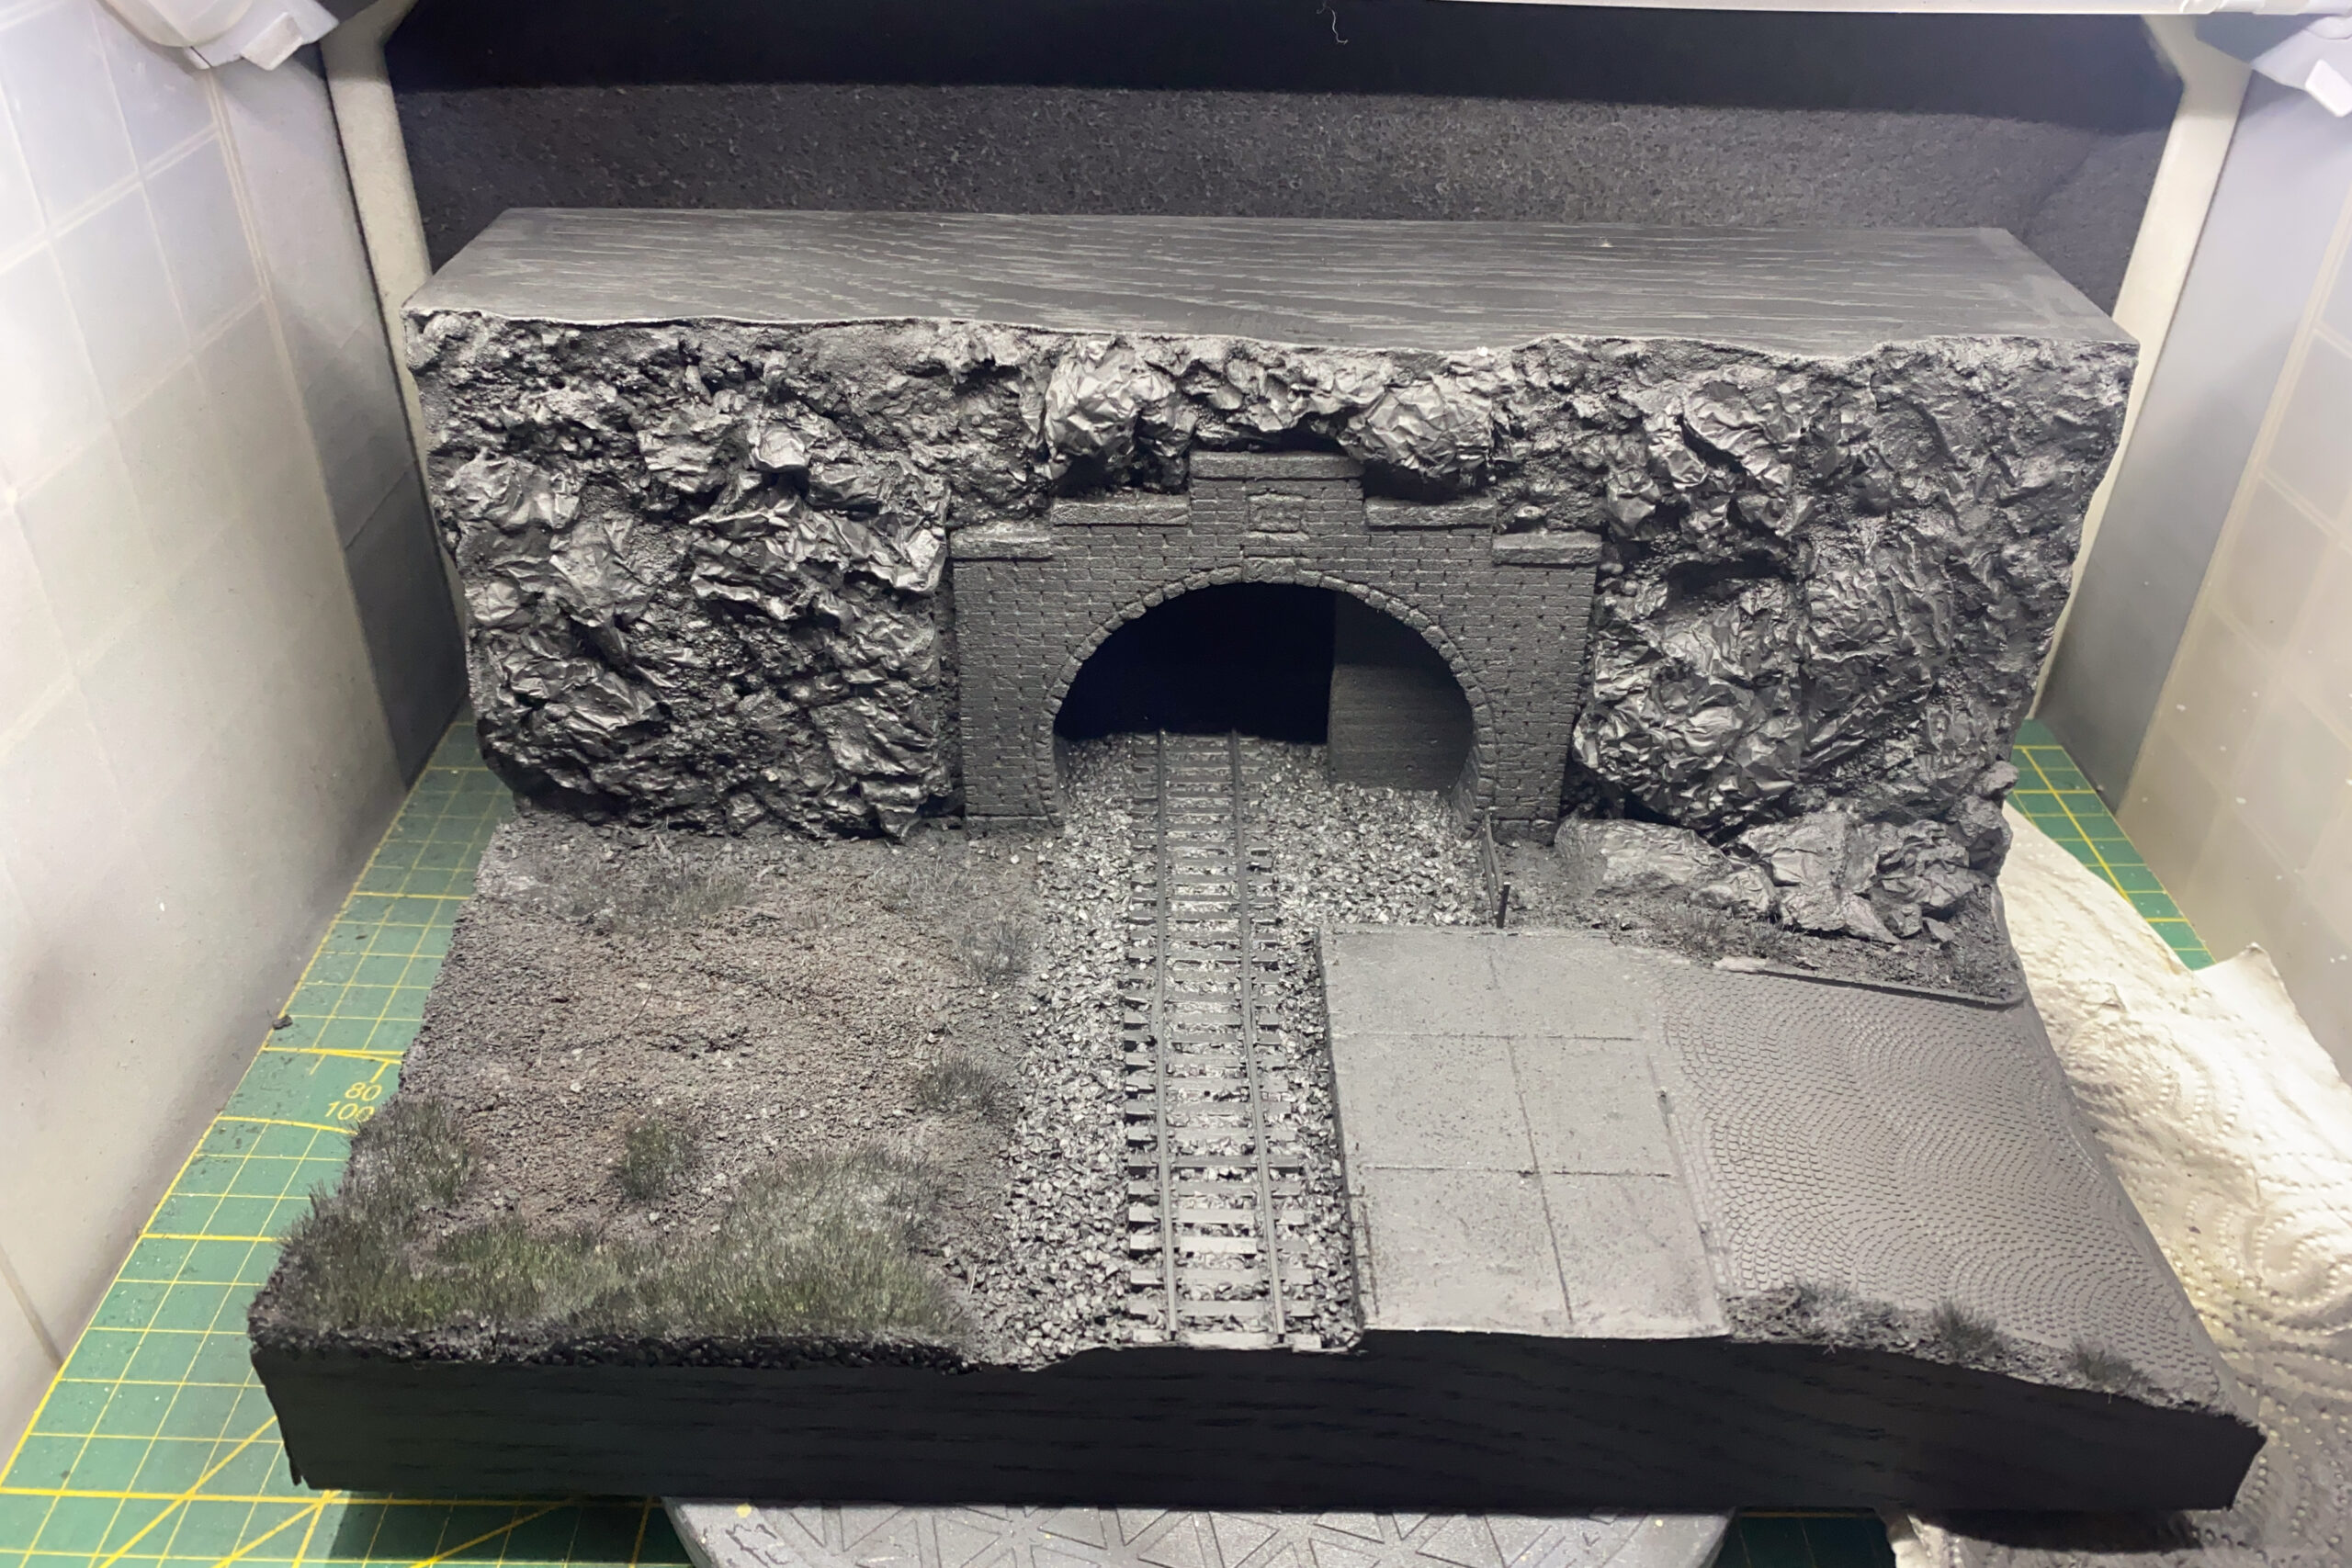
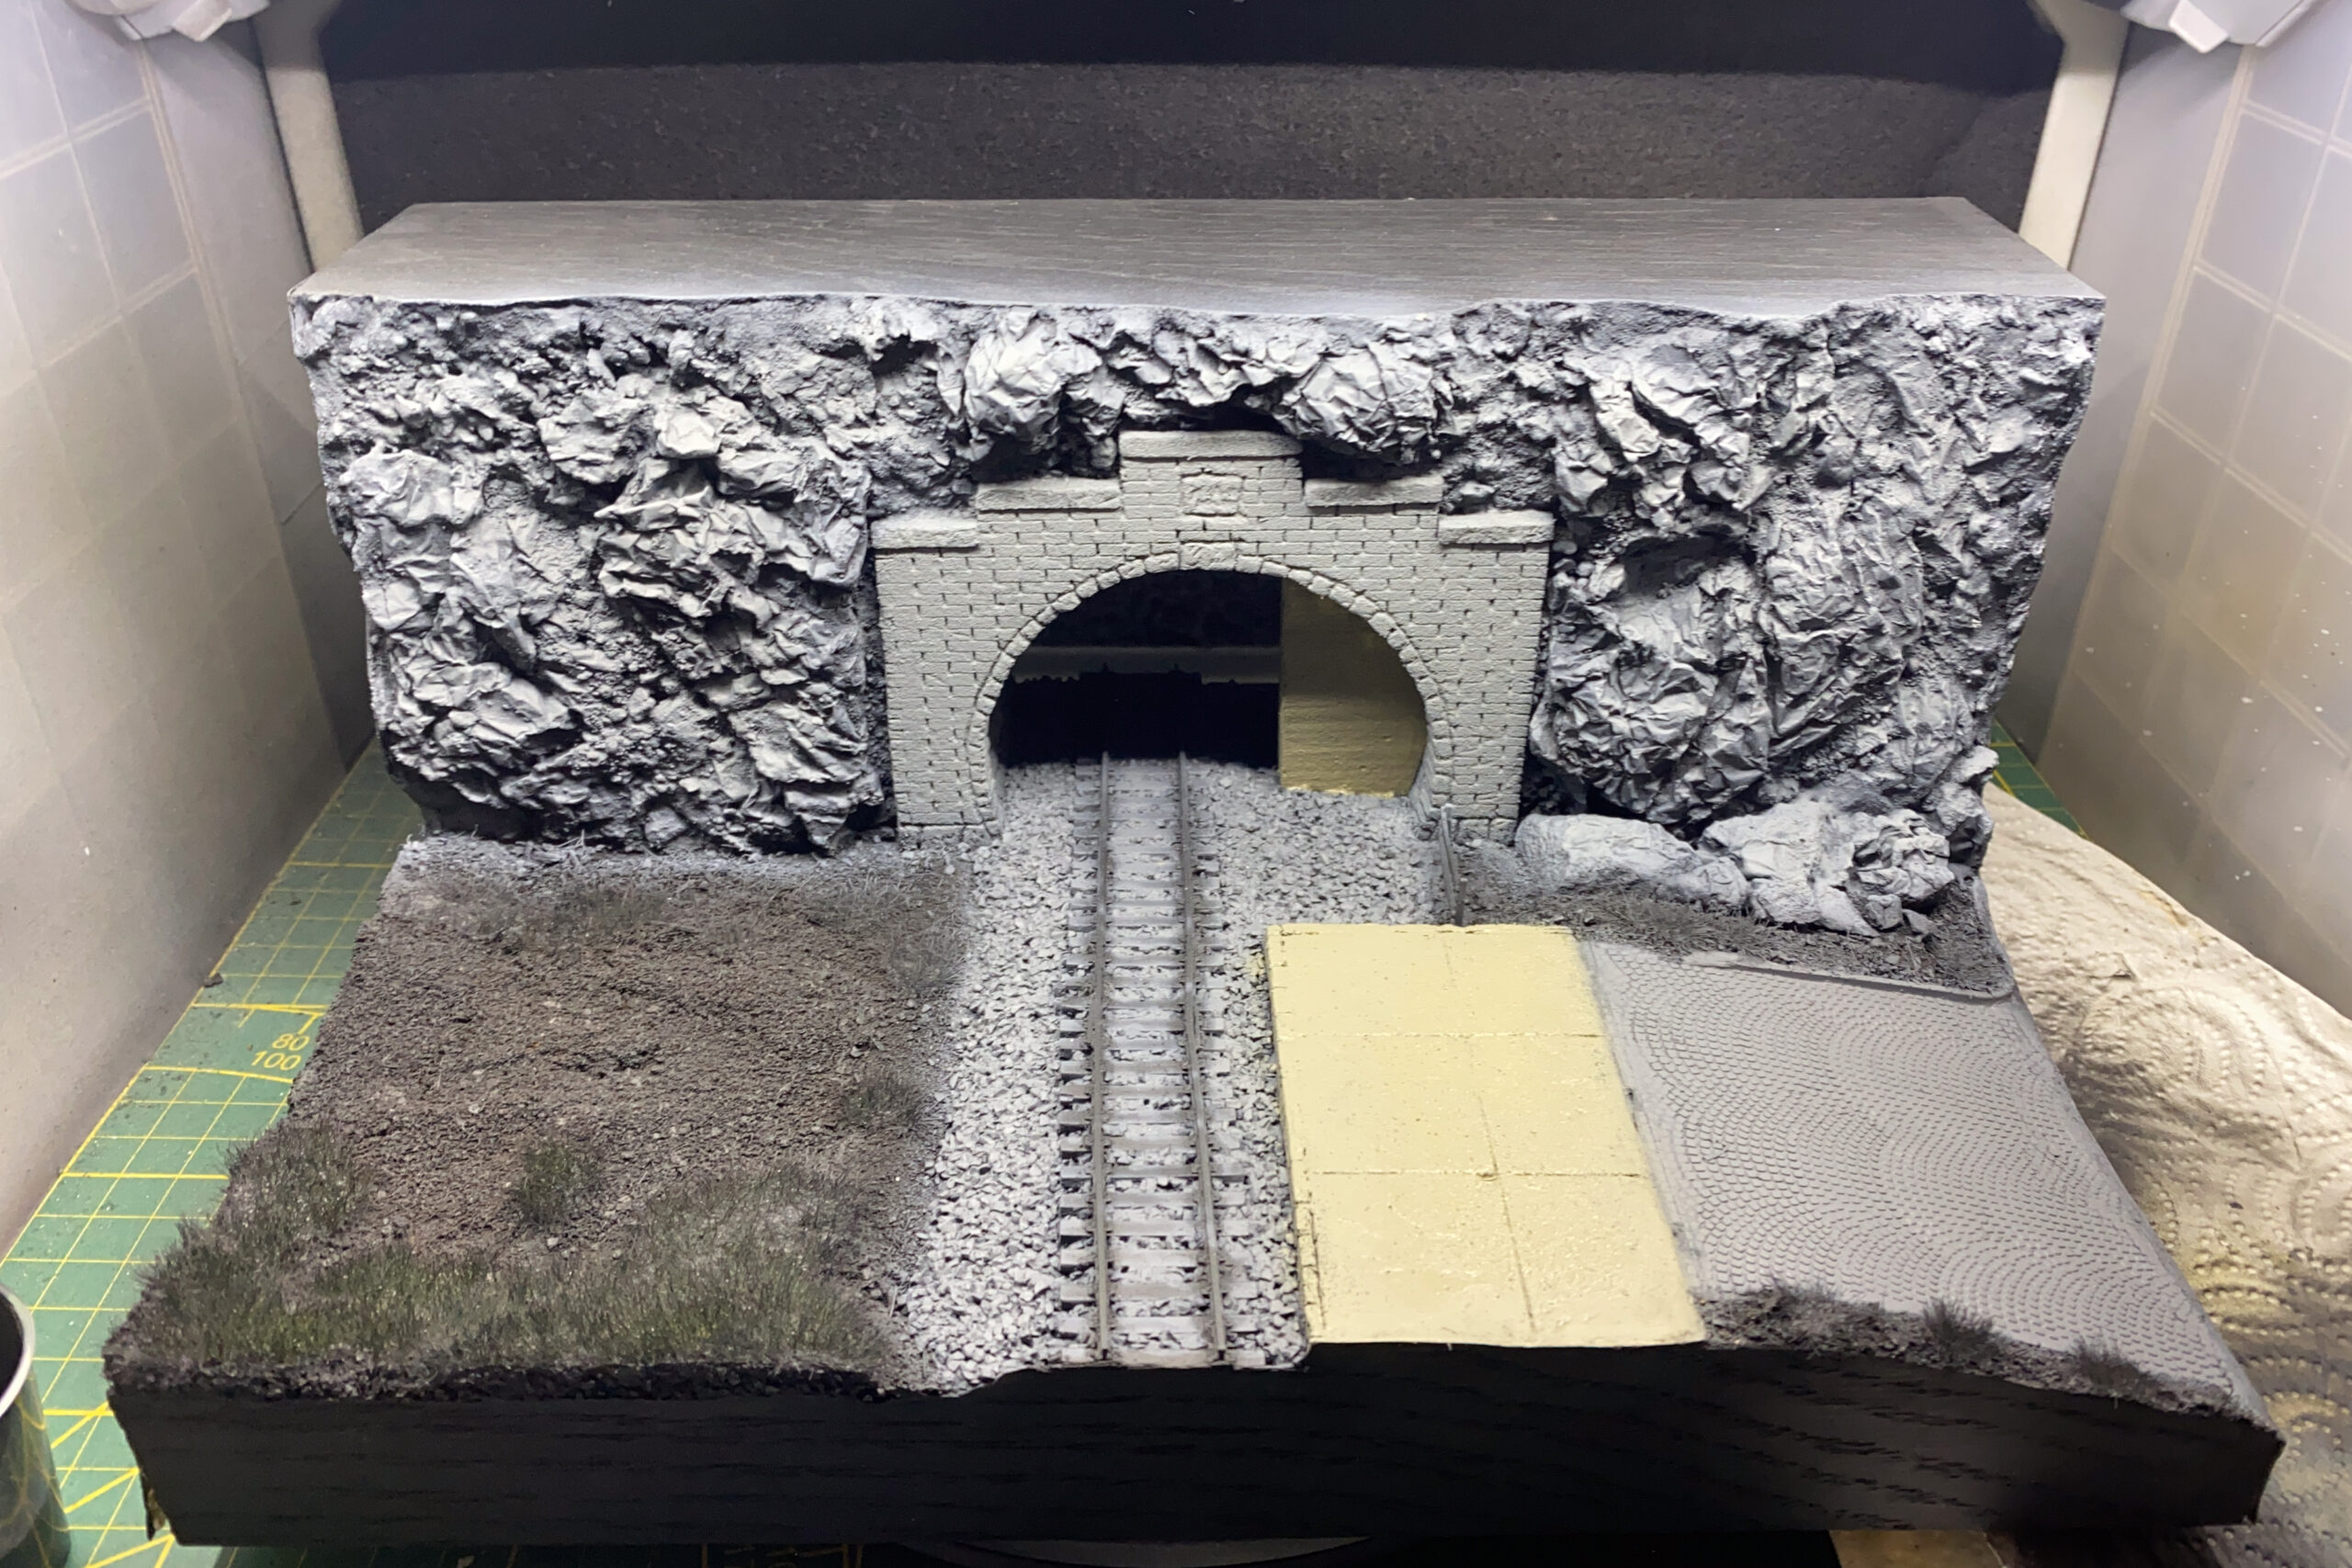
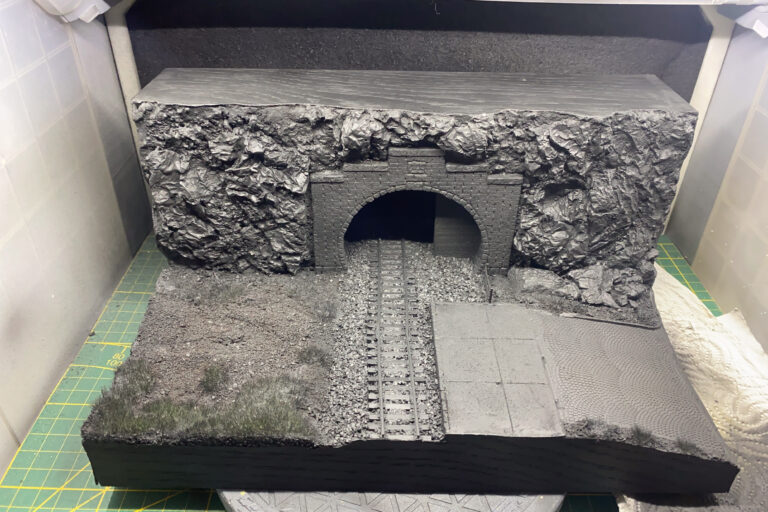
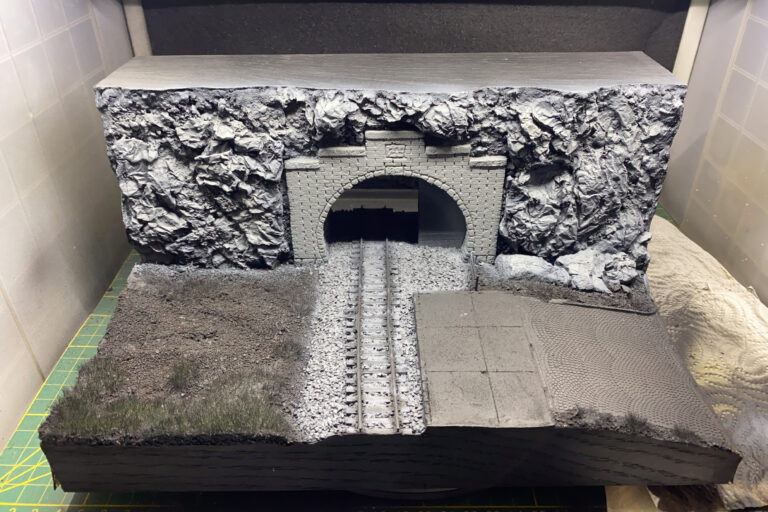
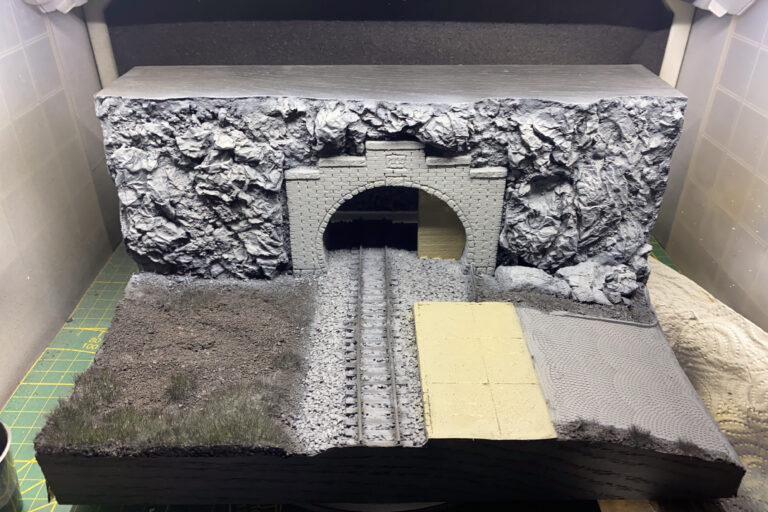
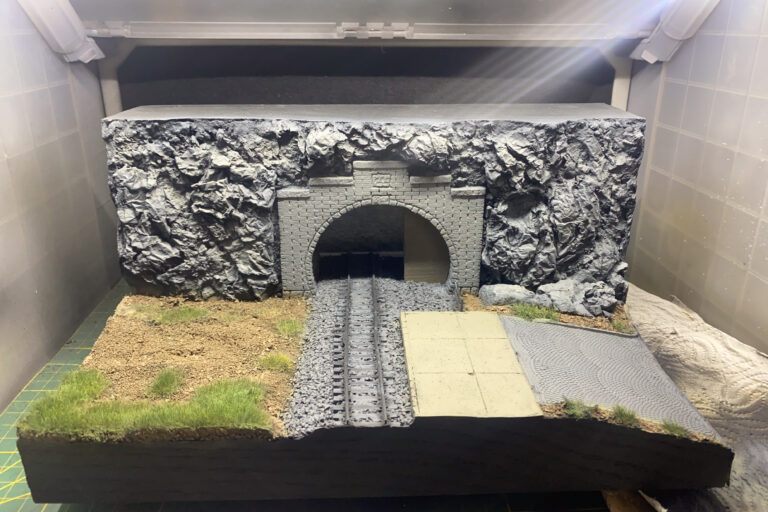
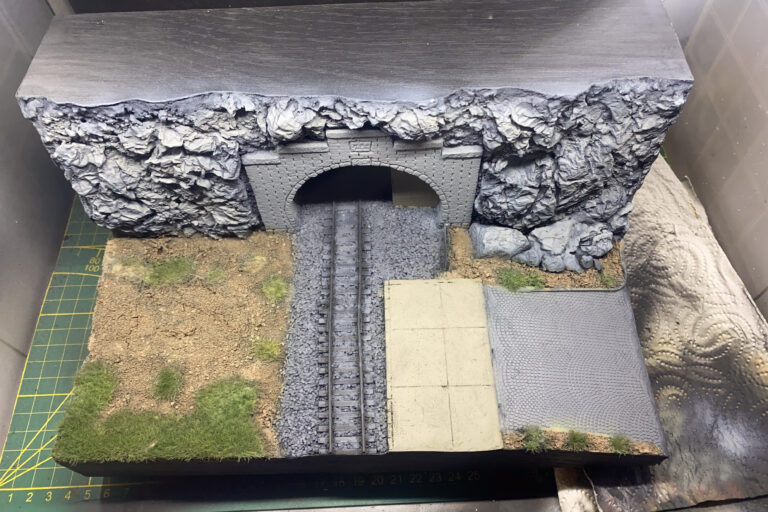
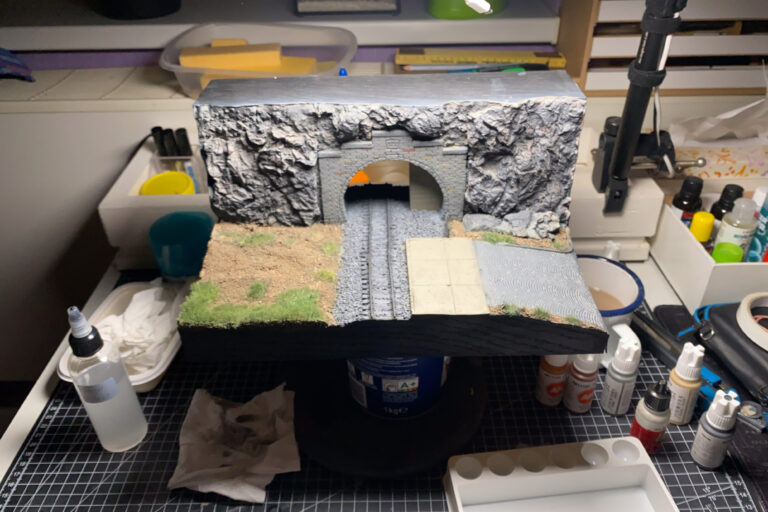
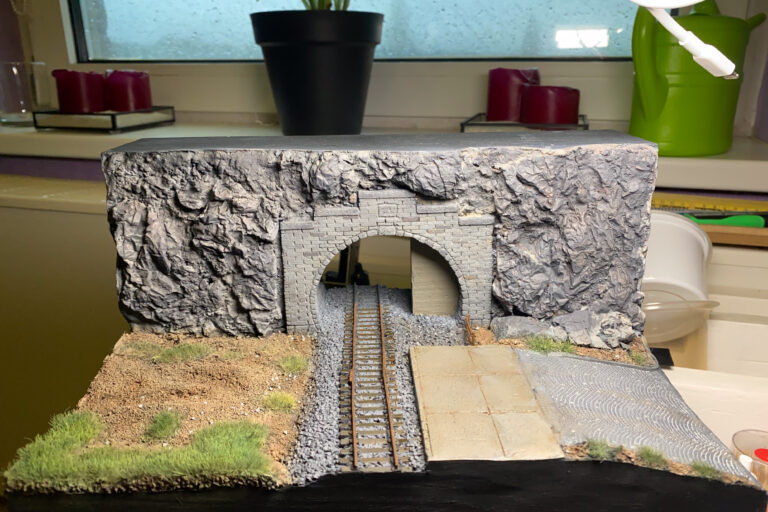
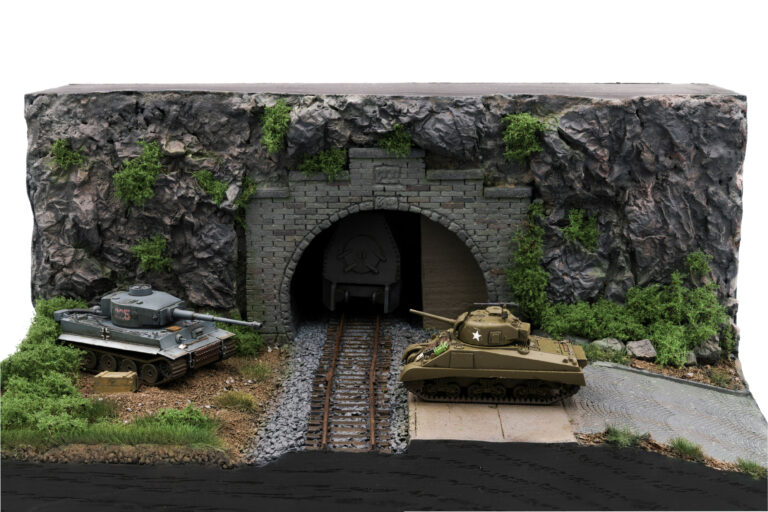
A block of rigid foam forms the base. I covered its sides with wood veneer to give the whole thing a clean edge. The rocks and portal are at the back. The track, soil, a platform and a strip of cobblestones are at the front. I primed everything black with Ammo’s One Shot Primer before adding any color, then lightened the surfaces with gray. You can see both stages in the photos from November 2024.
How to Build It: A Tunnel Portal from Rigid Foam
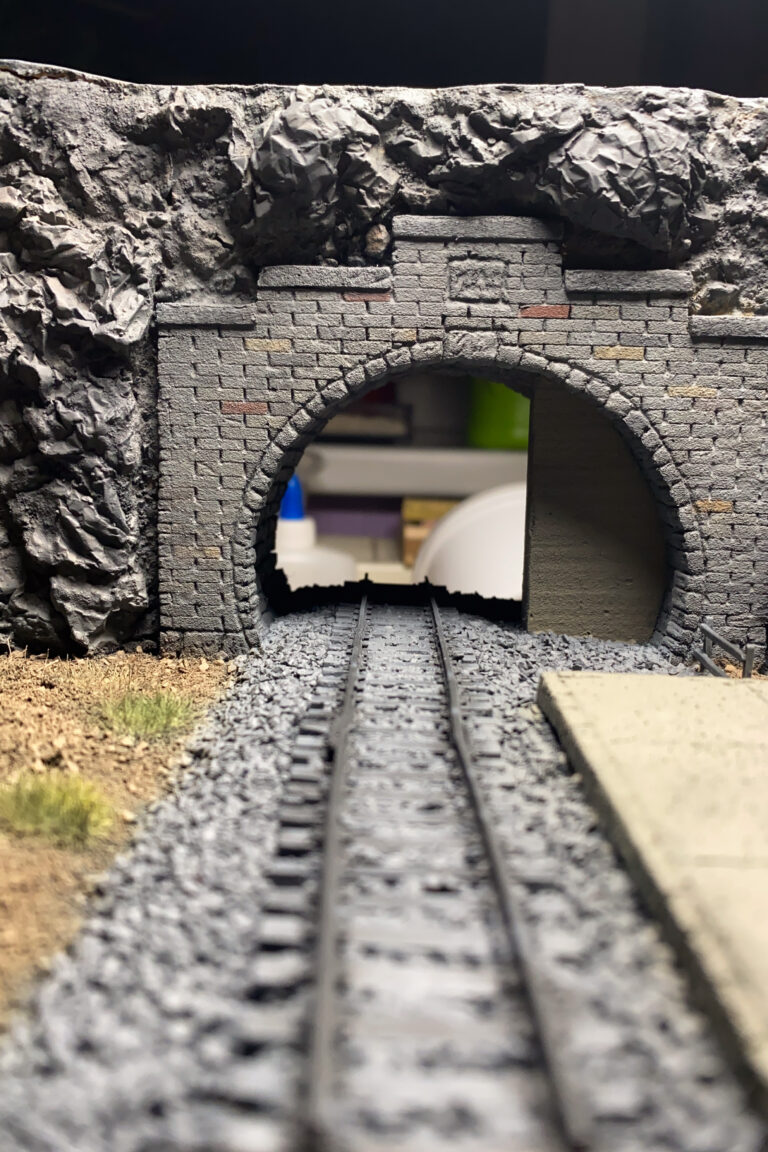
I started the portal by cutting its basic shape from a block of rigid foam. With a hobby knife and a toothpick, I engraved the stones one at a time. The work is monotonous. After a while, the quiet, dry scratching of the toothpick in the foam becomes part of it. The finished wall shows that the stones were made by hand.
Materials: rigid foam block, pencil, water-based black primer (I used Ammo One Shot), gray acrylic paint.
Tools: hobby knife with a fresh blade, toothpick.
- Draw the portal shape with its arch on the foam. A template from the model railroad world helps with the proportions.
- Cut out the outline and the tunnel opening, in several shallow passes rather than one deep cut.
- Engrave the stones one by one with the toothpick, the arch stones individually, not as one continuous line.
- Prime black and put the gray only on the edges. The joints stay dark.
One problem while working is that rigid foam crumbles. Its crumbs stick everywhere: in the carpet, on the desk and in the bed. A dull blade only makes that worse. Keep solvent-based spray cans away from it too. Rigid foam dissolves when exposed to them. That is why I used a water-based primer.
How to Build It: Rocks from Plaster and Aluminum Foil
I made the rocks using a method model builders have relied on for decades. There are no store-bought rocks or silicone molds here, just ordinary plaster from the hardware store. As it set, a faint chalky smell mixed with the usual bedroom aroma. Hardly a spa day, but exactly what you would expect from that hobby desk.
Materials: aluminum foil, plaster from the hardware store, water, a shallow tray or a piece of cardboard as a base, white glue (wood glue).
Tools: cup and spatula for mixing, old newspaper.
- Crumple the aluminum foil tightly and pull it apart again without smoothing it out. The creases become the rock texture.
- Lay the foil in the tray or on the cardboard so it forms a shallow hollow.
- Mix the plaster according to the package directions and pour it in.
- Let it dry completely, then peel off the foil.
- Break the slabs into pieces, arrange them on the rigid foam and glue them down with white glue until you have a formation with a recess for the portal.
- Prime black, lighten with gray. Plaster takes paint very well, every edge comes out.
How to Build It: Soil from Coffee Grounds
For the ground, I used a homemade soil mix on the rigid foam instead of filler. When it dries, the surface is rough and has real grain.
Materials: dried coffee grounds, sifted soil, small pebbles, white glue thinned with water, acrylic paints.
Tools: sieve, brush, pipette or spray bottle for the glue.
- Let the coffee grounds dry completely first. I simply left them out in the air. If you use them damp, they can go moldy under the paint.
- Mix coffee grounds, soil and pebbles. The coffee grounds bring a fine grain and an earthy base color.
- Brush the area with the thinned white glue, sprinkle the mix on and press it down lightly.
- Soak it with glue once more from above until everything is wet through, and let it dry.
- Prime black together with the rest of the base, then tint with acrylic paints.
I added static grass in different lengths and a few bushes on top. Both are from AK. I put them on with glue, tapped them in and shook off the loose material. There isn’t much vegetation. It is spring in the scene, so nature is alive, but it shouldn’t take over. The tunnel, tanks and locomotive are where the eye should go.
I didn’t make everything on the base from scratch. Model railroad ballast sits under the track, held in place with thinned white glue. I cut the platform the Sherman stands on from rigid foam. The cobblestones next to it are a piece of an old HO level crossing. I found it in a box meant for the trash, and it probably dates from the nineties. You can’t tell in the finished scene that it was intended for another scale.
This diorama isn’t suitable as gaming terrain, by the way. The plaster rocks would not last long if handled often. It belongs in a display case. The same method can still be used for 15 mm gaming terrain, though. Plaster rocks and coffee-ground soil cost next to nothing.
The Vehicles
The Sherman
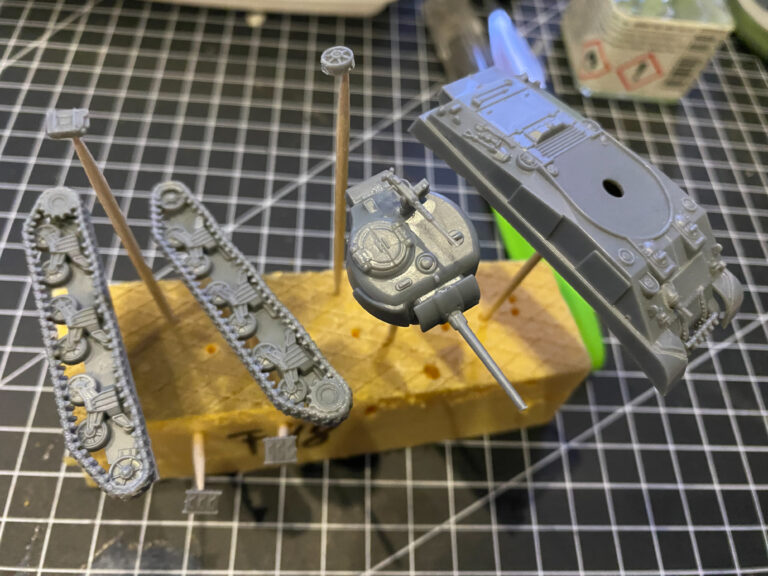
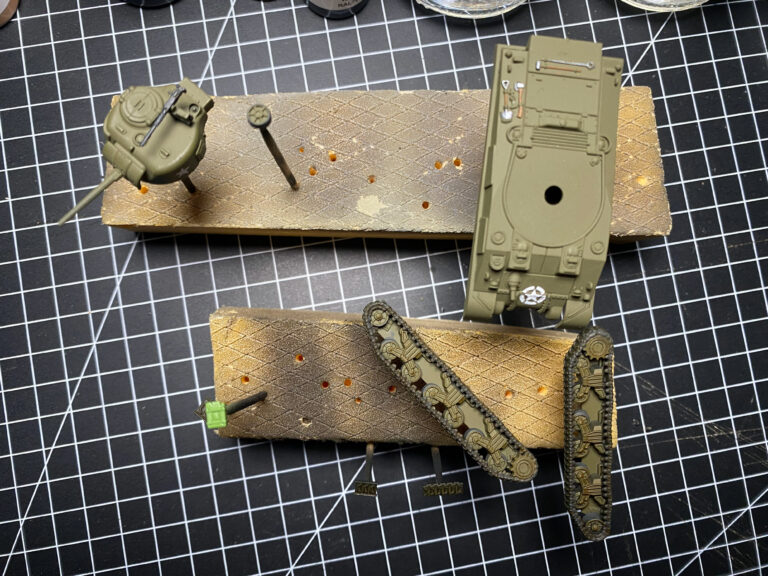
The Sherman began as a sprue and nothing else. There was no box and no instruction sheet, just parts on a frame. I cut off the parts, cleaned them up and test-fit them. As with my other classic plastic kits, I used Tamiya Extra Thin to glue them. It flows into the seams, softens the plastic a little and welds the parts together.
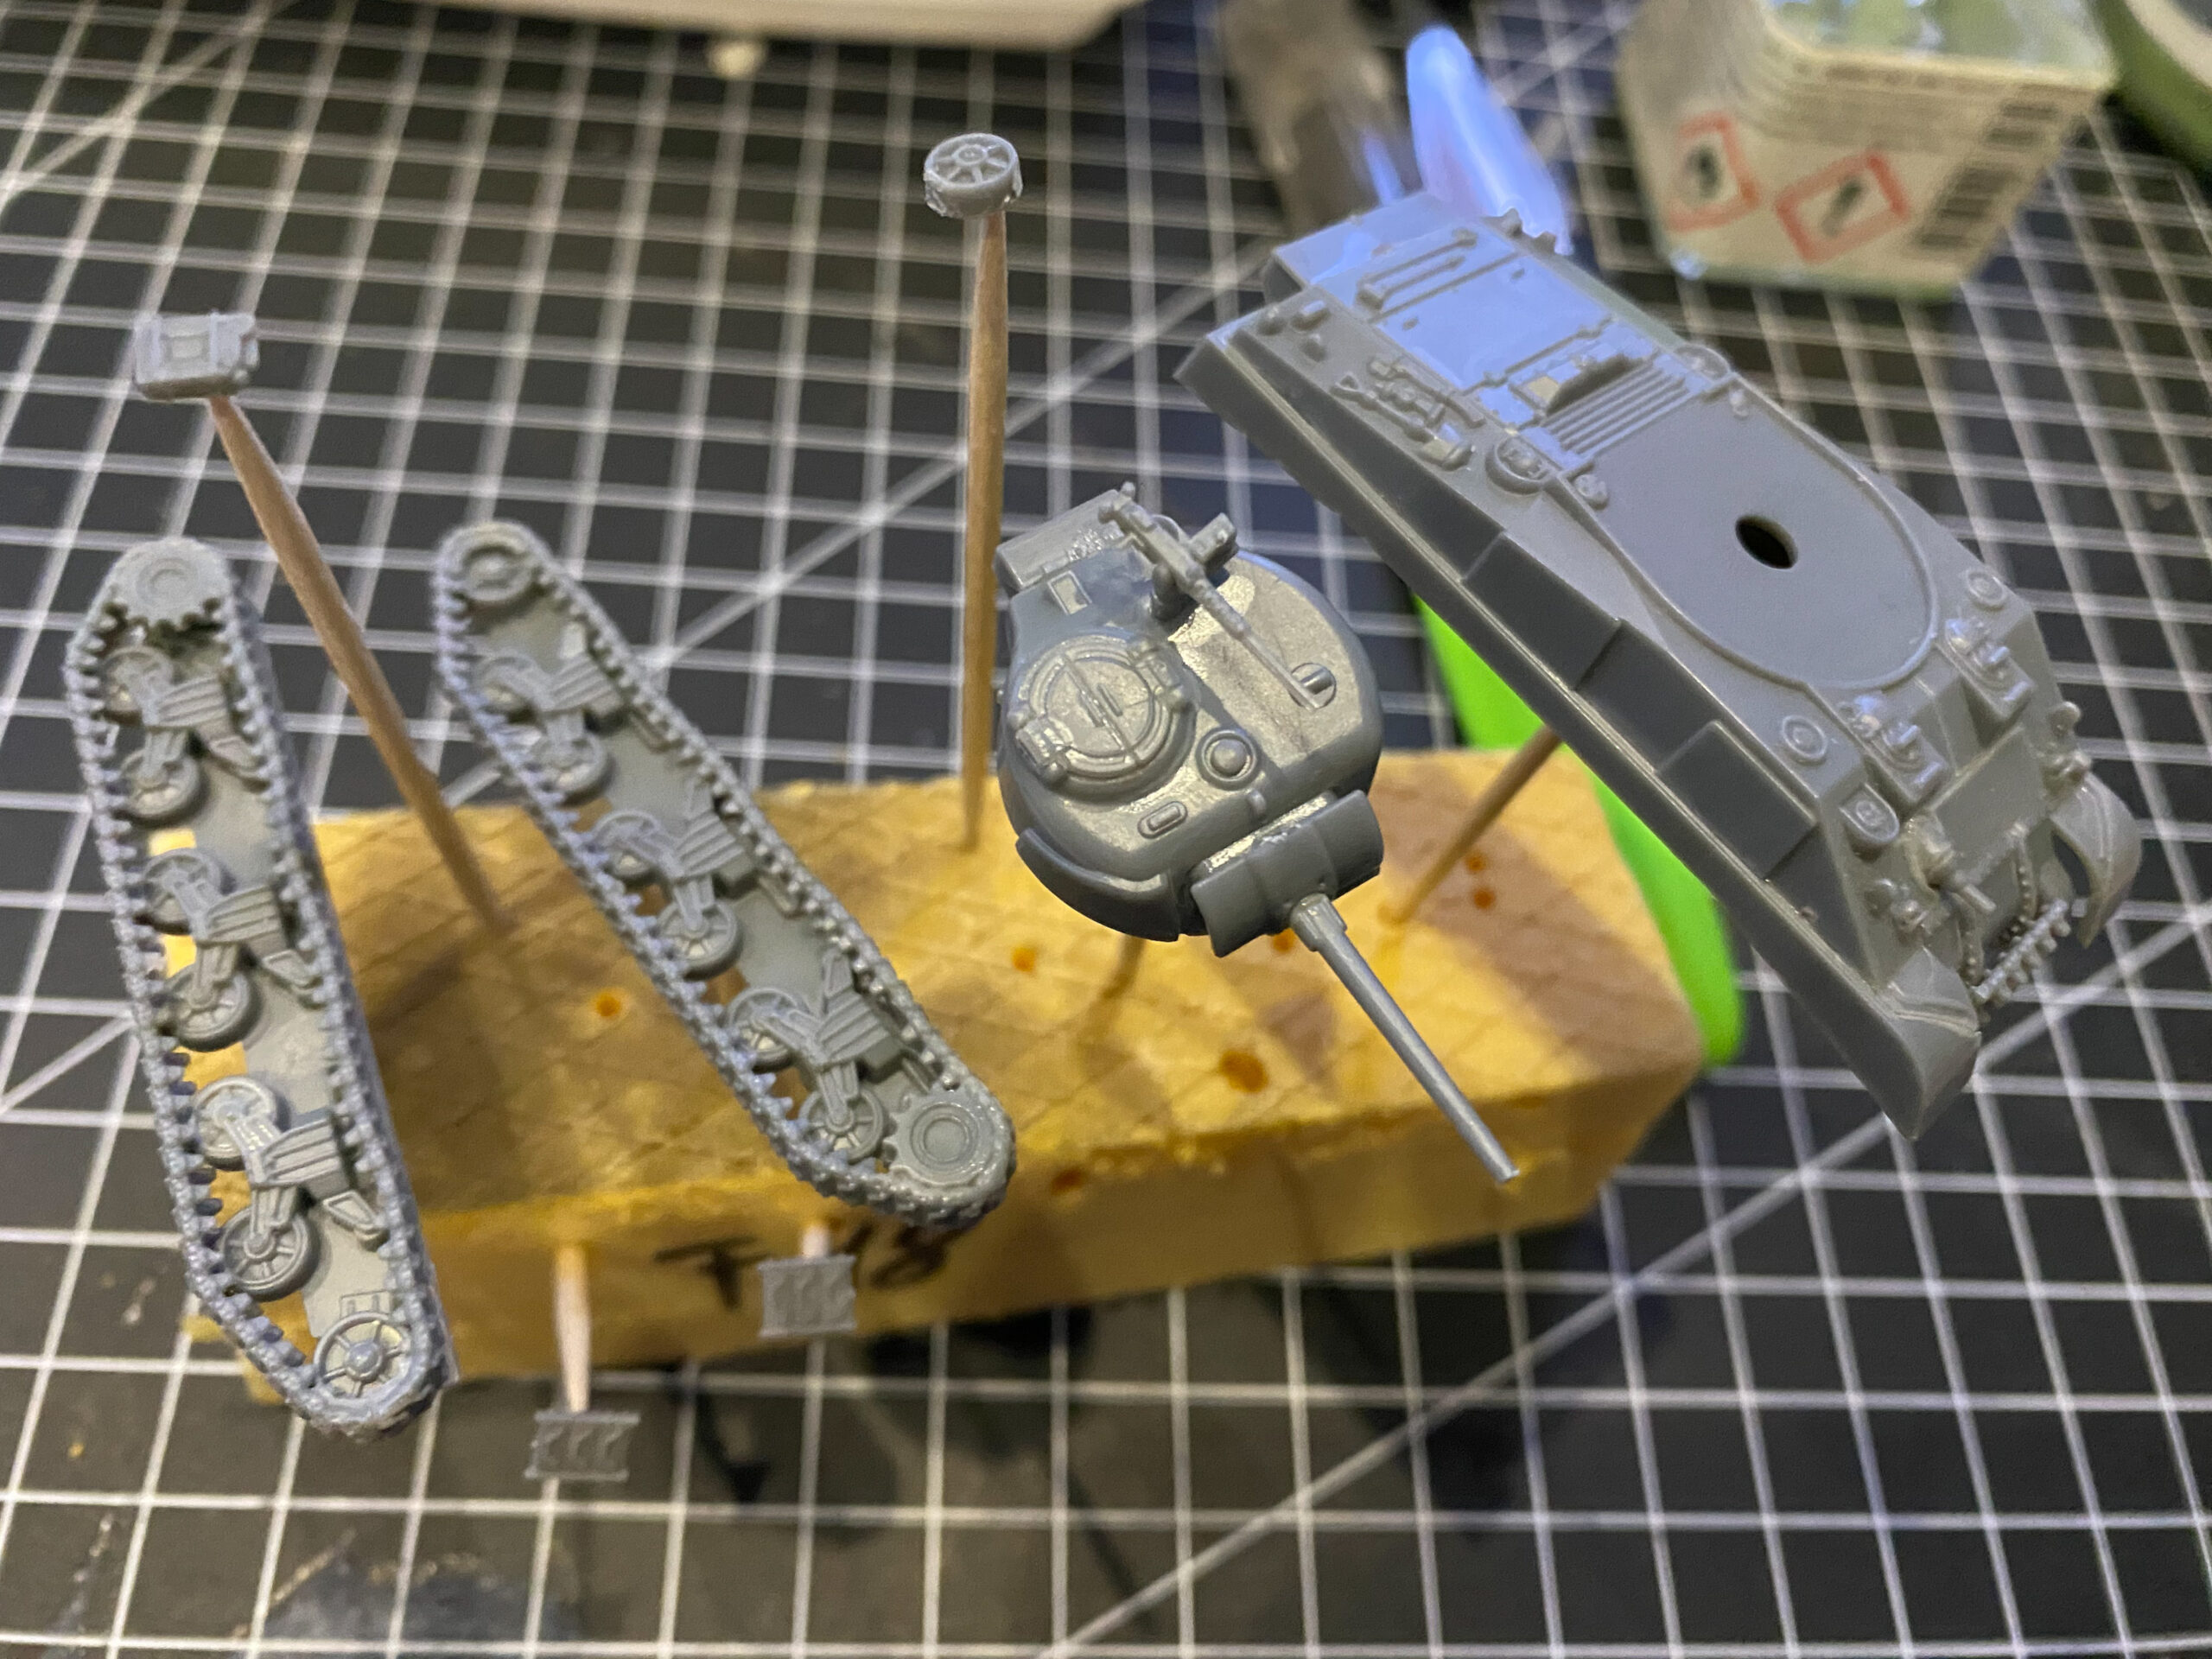
I wanted the color close to the real vehicle without hunting for specific paint numbers. The black primer was there to give it depth and serve as shadow later. I sprayed an olive tone over it for the familiar Sherman look. I don’t remember the exact color. I never wrote it down, and too much time has passed since the build. I wanted a Sherman, not a fantasy tank. There is hardly any weathering on it. That wasn’t a deliberate choice for dramatic effect. At some point, I simply ran out of steam.
I can’t say for sure which Sherman version the kit represents. Its front hull looks more angular than cast. The part is too small and its origin too unclear to say more. There is no interior in 1:100, so I concentrated on outline and silhouette. From a normal viewing distance it is instantly recognizable as a Sherman.
The Tiger
The Tiger I is from Zvezda, kit 6256, in 1:100 scale. For that size it is solid: a recognizable turret shape, gun, road wheels, the typical Tiger silhouette. It is designed as a snap-fit kit with only a few parts. I still glued every joint with Tamiya Extra Thin. On a diorama that gets moved or picked up now and then, I don’t want to rely on snap fits. Assembly went without disasters. Nothing broke off, nothing had to be rescued.
I primed the Tiger black too, then added a gray whose exact name I have forgotten. It shouldn’t look as though it had just left the factory. I wanted worn edges, dark recesses and chipped paint, with dust and dirt on the tracks and lower hull. I put a little rust in a few places. By the end, it looked like a veteran that had covered too many miles with too few days of maintenance.
Locomotive and Small Parts from the Resin Printer
I needed a train for the scene. A tunnel with empty tracks looks like an empty stage. I have to admit that my partner came up with the idea of putting a real locomotive in it. I found “1_72 Panzerlok BR57” by Skyfox3Ddesigns on Thingiverse. The file was released under the CC BY 4.0 license. It is designed for 1:72, which made it too large for my scene.
How to Build It: Scaling Someone Else’s Print File to 1:100
Materials: print file, resin printer, resin, isopropyl alcohol for washing, UV light for curing.
Tools: slicer software, side cutters, fine sandpaper, hobby knife.
- Work out the factor. The scale number of the source divided by the scale number of the target. To go from 1:72 to 1:100, divide 72 by 100, so 0.72 or 72 percent. A file made for HO (1:87) gets 0.87.
- Only print what shows. After scaling, I cut the locomotive off in the slicer behind the front five centimeters (2 in). The rest disappears into the tunnel anyway. That saves resin and print time.
- Print, wash, cure. Remove the supports after washing and carefully sand the attachment points.
- Fit it. Set the locomotive front into the portal so the cut edge sits in the dark.
⚠️ Safety note: I print with Anycubic Standard Resin. According to the manufacturer’s safety data sheet (revision 3.0, dated November 10, 2023), the liquid resin may cause an allergic skin reaction and irritates the eyes and airways. So only work with chemical-resistant gloves rated to EN 374 and safety glasses, only print and wash in a well-ventilated room, and take liquid leftovers and their containers to an approved disposal site, never down the drain.
I then matched the locomotive front to the rest of the scene with color and gave it some dust and dirt. It shouldn’t look like a wreck. You should still be able to see that it has been through a few things.
The tracks are printed too, from a file with HO rail profiles, scaled to 1:100. The result is clean rails that glue down well on ballast and soil. They just aren’t sturdy. I had to re-glue them several times during assembly, rails that size are extremely fragile. The barrels, jerry cans and crates also come from Thingiverse files, scaled and printed like the locomotive. They loosen up the picture and give the eye something to do around the edges.
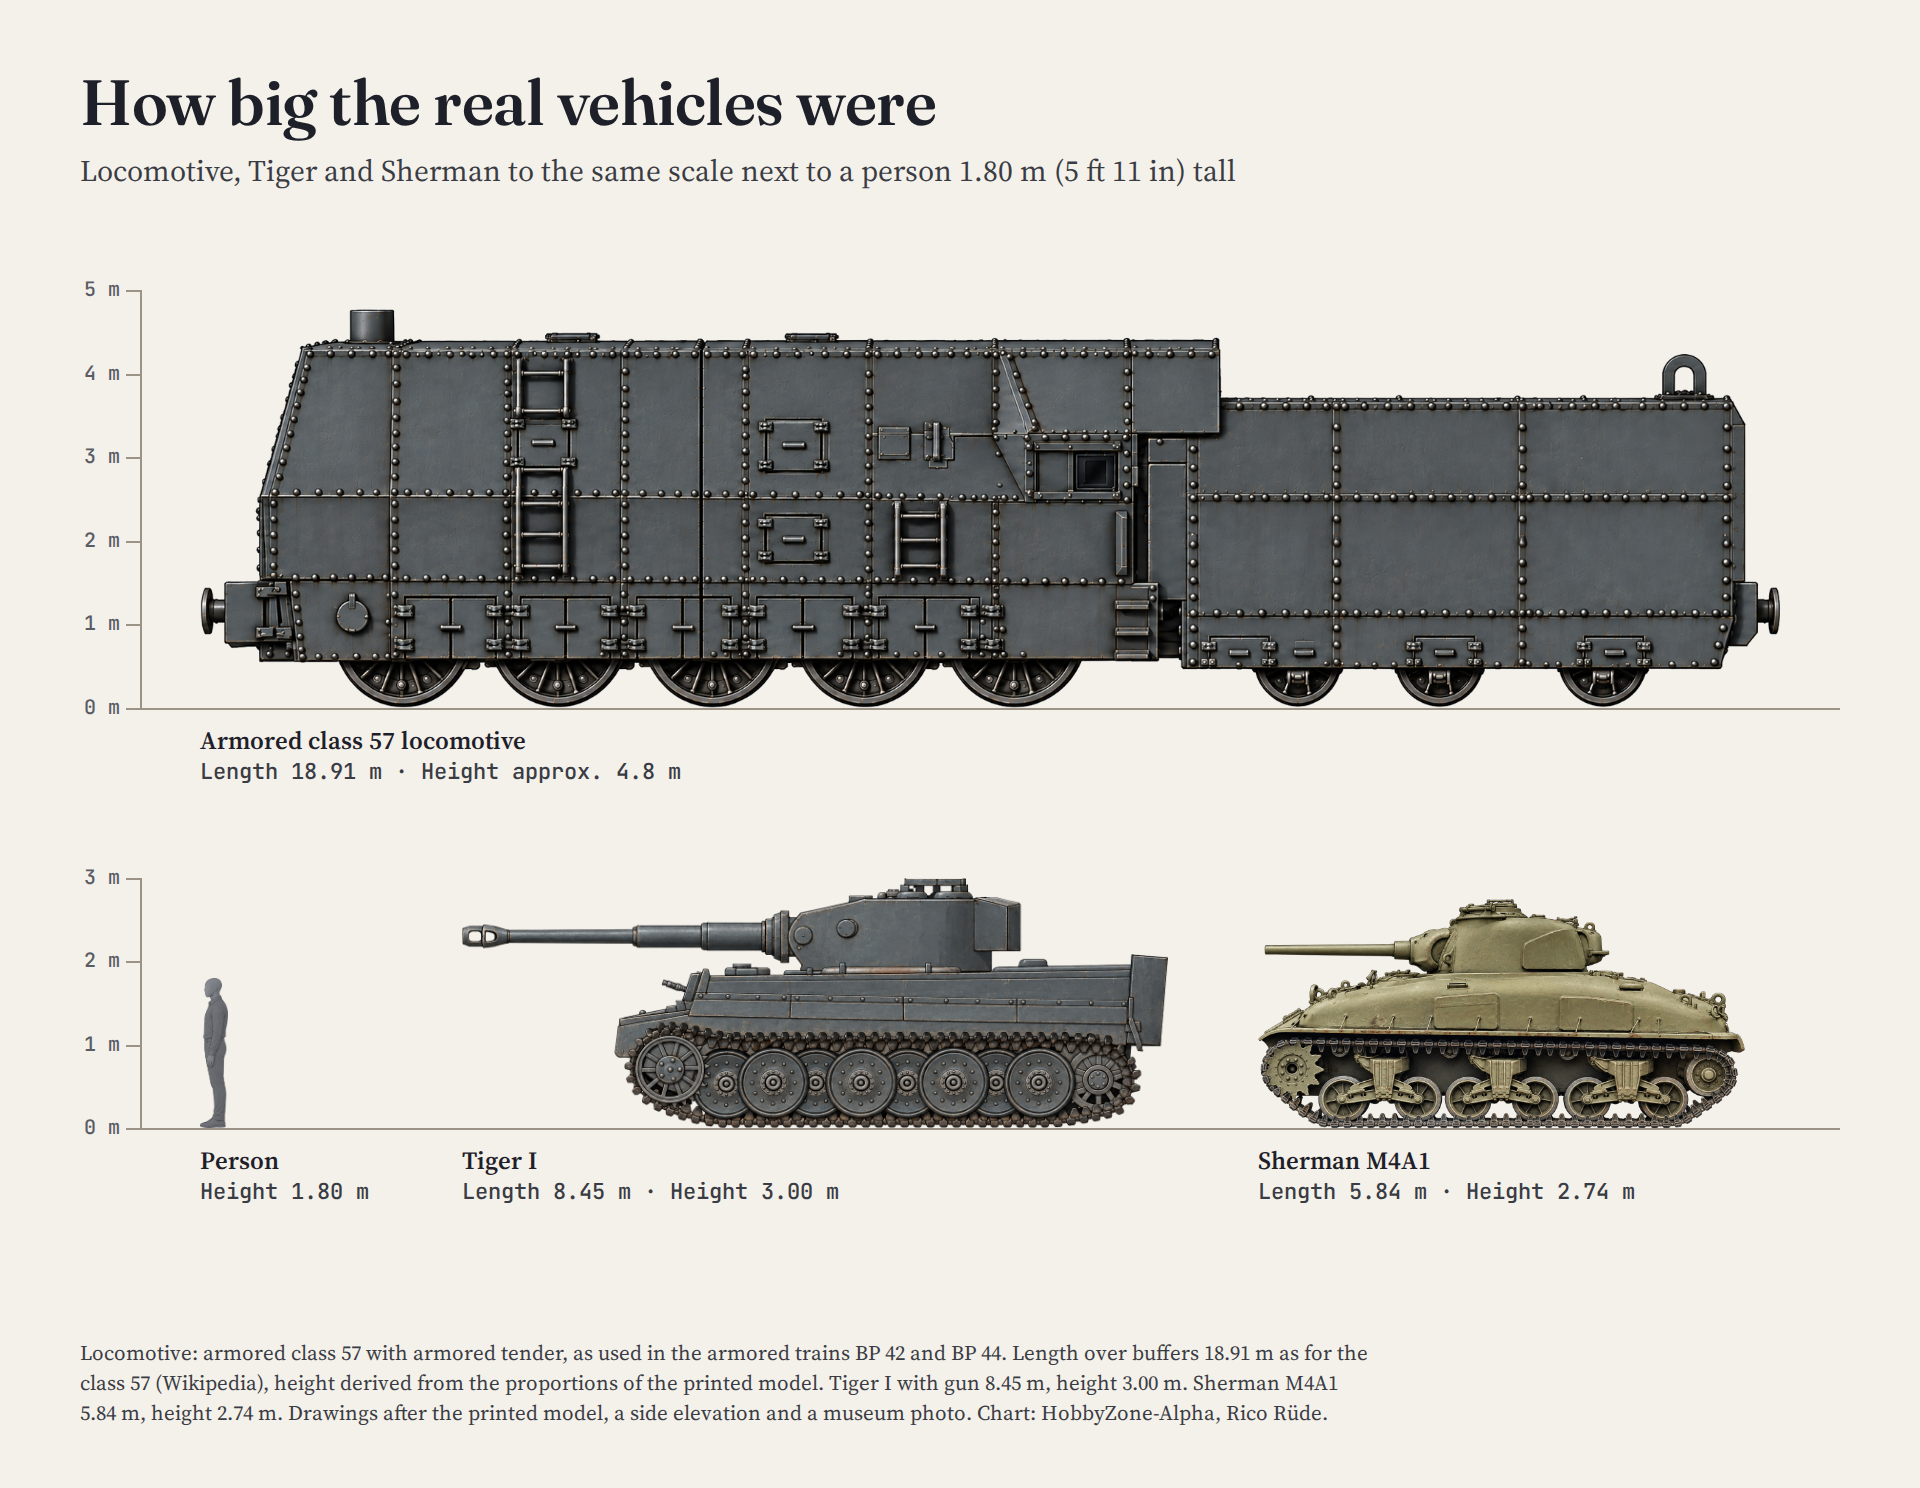
The Real Vehicles: Tiger I and Sherman
Tiger I
Henschel built the Panzerkampfwagen VI Tiger I in Kassel between July 1942 and August 1944. During that period, 1,347 vehicles were made. The figures come from the Tank Museum in Bovington, England. It owns a captured Tiger itself, Tiger 131. The tank weighed about 57 metric tons, carried a crew of five and had an 8.8 cm KwK 36 L/56. That tank gun was derived from the famous 88 mm flak gun. The armor on the front of the hull was 100 millimeters (3.9 in) thick. The mantlet in front of the gun was thicker still.
Its strength had a cost. With the tank weighing over 50 tons, the running gear and transmission worked at their limit. Tigers often broke down without regular maintenance, while their high fuel consumption cut their range. That was the tank I pictured as I built: a heavy machine still standing there, though its time had run out.
My Tiger’s color is only partly accurate. From February 1943, new tanks left the factory in Dunkelgelb, a dark sand yellow, rather than gray. For my gray Tiger to be there in 1945, it would have to belong to the first production series and probably never have been repainted. Some old vehicles were still around. The Tank Museum says that six Tigers from the tank school were assigned to a battle group as late as April 1945.
Sherman
Opposite the Tiger stands the M4 Sherman, the US Army’s standard tank. About 49,000 were built in the United States alone between February 1942 and July 1945. The commonly quoted figure is 49,234. Early versions carried a 75 mm M3 gun. Many later models had a 76 mm gun instead.
The Sherman’s gun and armor were weaker than the Tiger’s. It was easier to build, maintain and supply, though, and there were many more Shermans. My view, which appears in plenty of accounts, is that a Sherman fighting a Tiger alone was outmatched. Shermans seldom rolled alone, however, and they had artillery and fighter-bombers behind them.
I didn’t give the Sherman a heroic pose in the diorama. It represents the other side of the war’s final days. The war is nearly over, yet the vehicles are still rolling.
Model, Story, Reality
Here is what “The Last Order” made of the scene, without giving too much away. The setting is the Harz Mountains in May 1945, after the war has officially ended. A Tiger stands before a railroad tunnel. Its engine has been dead for weeks, and it has one last crate of shells. Then a Sherman arrives. A cargo waits inside the tunnel, along with an order to destroy it before it falls into enemy hands.
Here is how model, story and sources line up:
| Model | “The Last Order” | Reality | |
|---|---|---|---|
| Tiger | gray, heavily weathered, next to the portal | engine dead for weeks, stands in front of the portal | Production ended in August 1944. I could not confirm whether Tiger Is were in action in the Harz Mountains. |
| Sherman | olive drab, clean, version unknown | an M4A1, “still fairly free of battle scars” | The M4A1 had a cast, rounded upper hull. 6,281 were built with the 75 mm gun and 3,426 with the 76 mm gun. |
| Locomotive | front of an armored BR 57, scaled down from 1:72 | armored locomotive BR 57, carrying the cargo | The BR 57 class is mostly the Prussian G 10, a freight locomotive. According to the model kit literature, armored engines of this class pulled the BP 42 and BP 44 armored trains, mostly in the East. There is no record of this in the Harz Mountains. |
| Place and time | “last days of the war, 1945,” no place | Harz Mountains, May 1945, after the end of the war | The German 11th Army in the Harz surrendered on April 21 or 23, 1945, the sources give both dates. The story sets its scene after that. |
| Cargo | barrels, jerry cans, crates around the edges | the last crate of shells, the cargo in the tunnel | Made up. |
The Sherman differs in one more respect. The story calls it an M4A1, but my model’s front looks rather angular, so it probably isn’t one. Both are clean. In the story, the Sherman is “still fairly free of battle scars.” On the model, I had simply run out of steam.
What I Learned
This diorama was never a showpiece. It was a typical in-between build and showed me a few things for exactly that reason. Printed rails in 1:100 break if you so much as look at them wrong. With a locomotive, you only need the part you can see sticking out of the tunnel. And before a box goes in the trash, it’s worth one last look inside.
Even so, 1:100 won’t become my favorite scale. You can still make something of it. The Tiger has a surprising amount of mass at that size. The Sherman is small but holds its own. With its front half inside the tunnel, the locomotive draws the eye toward the back. The finished scene felt more complete than I had expected while making it.
I built other dioramas on this site quite differently, including the Revell Boeing 747 on its airfield and Baby Groot from the printer on his base. Both posts are in German. The project on Scalemates has all the data for this one, and the gallery below the post has the full-size photos.
If you’re thinking about a diorama in 1:100 or 1:72, start with what you have. Use a kit that’s been lying around or a scale you would usually pass over. Mine became a Tiger that no longer runs, standing before a tunnel nothing comes out of anymore. You can read what happens next in “The Last Order”.
Sources
- Tank Museum Bovington: Building the Tiger Tank (production numbers, production period, Henschel in Kassel)
- Wikipedia: Tiger I, citing Jentz and Doyle as well as Trewhitt (weight, armament, armor, length)
- Wikipedia: M4 Sherman, citing Zaloga (production numbers, versions, lengths)
- Wikipedia: 11th Army (Wehrmacht) and the after-action reports of the 8th Armored Division at 8th-armored.org (Harz, April 1945)
- German Army order No. 181 of February 18, 1943 on the base color Dunkelgelb, via miniatures.de and armorama.com
- Wikipedia: Prussian G 10 (class 57)
- Kit reviews at militarymodelscene.com and armorama.com (armored BR 57 in the BP 42 and BP 44 armored trains)
- Anycubic: Safety data sheet Standard Resin, revision 3.0 of November 10, 2023
- European Central Bank: technical data of the euro coins
- Thingiverse: “1_72 Panzerlok BR57” by Skyfox3Ddesigns, CC BY 4.0
